
We are currently refreshing the laundry room and I am slowly completing a project to update this space. We finished it almost 7 years ago and it is one of the most used rooms in our house (after the kitchen). But now that we have 3 kids and my style has evolved, it’s time for some changes! My latest project is to make a shelving with wooden gallery rails and I’m here to share all the details with you!
When we first finished the laundry room, we put a shelf against the wall above the washer and dryer that was about 5 feet long. I don’t know why I decided on that length or why I didn’t extend it all the way to the wall. It was the start of my design journey and the laundry room was the first room I ever designed from top to bottom!
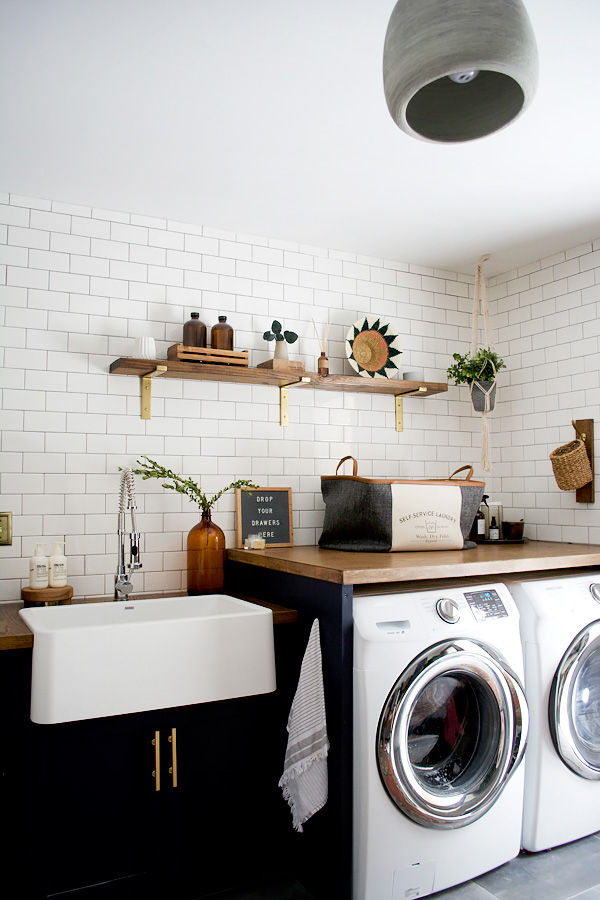
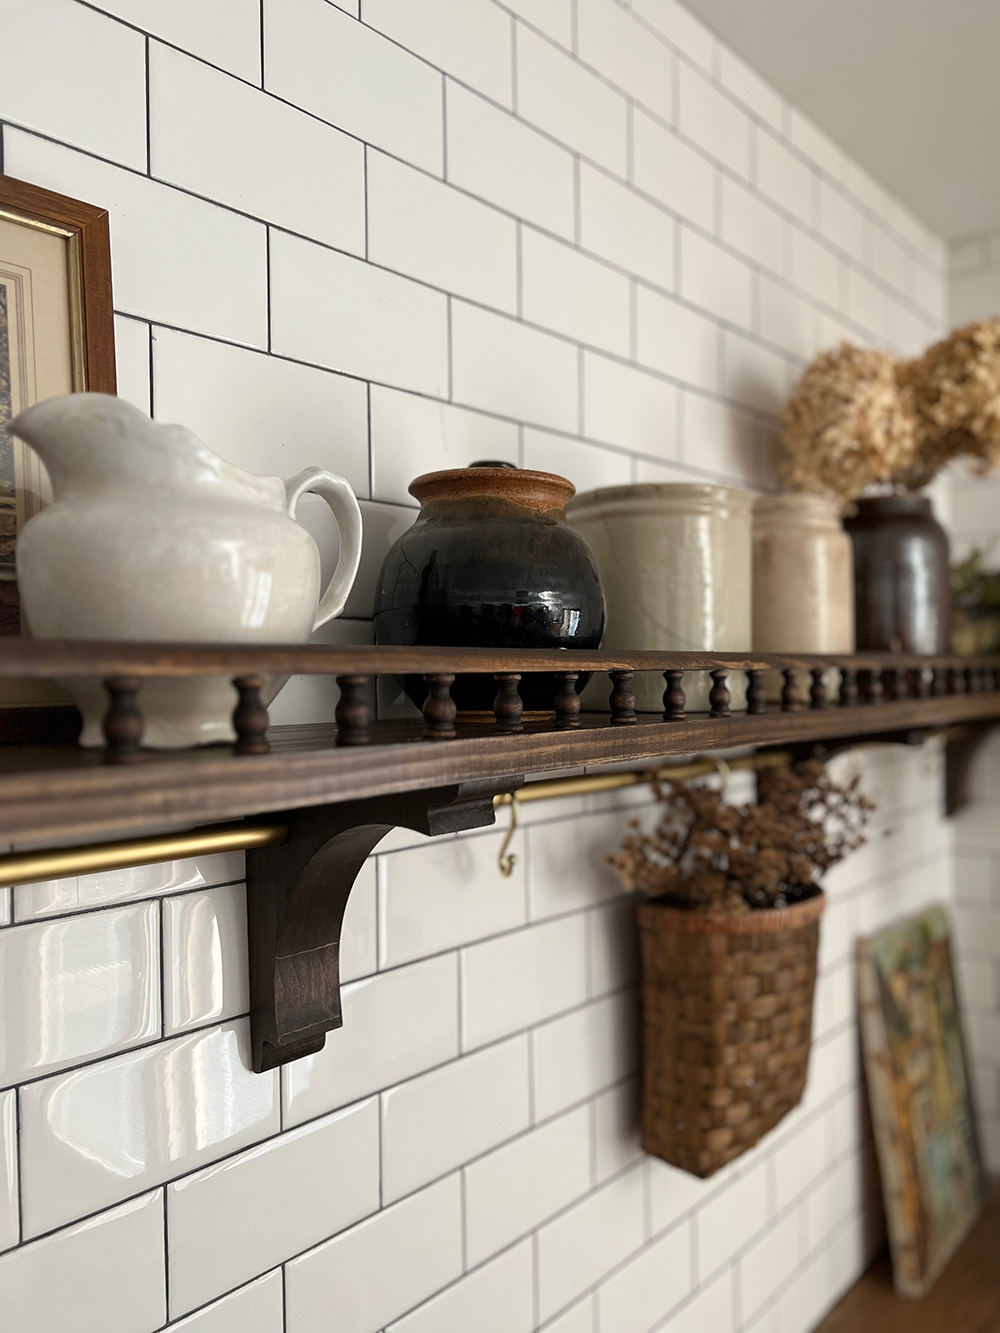
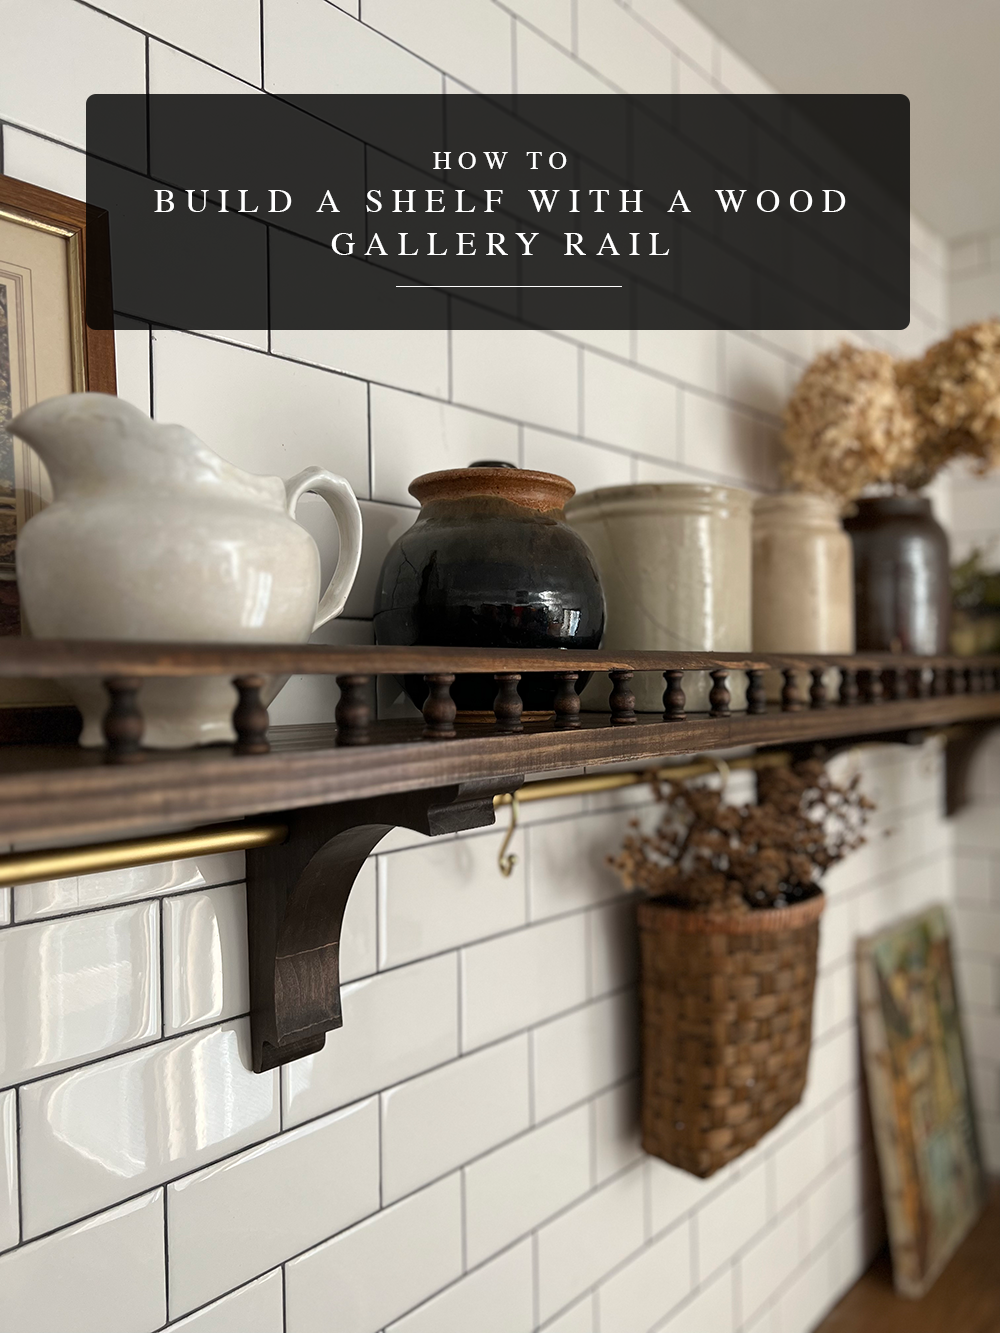
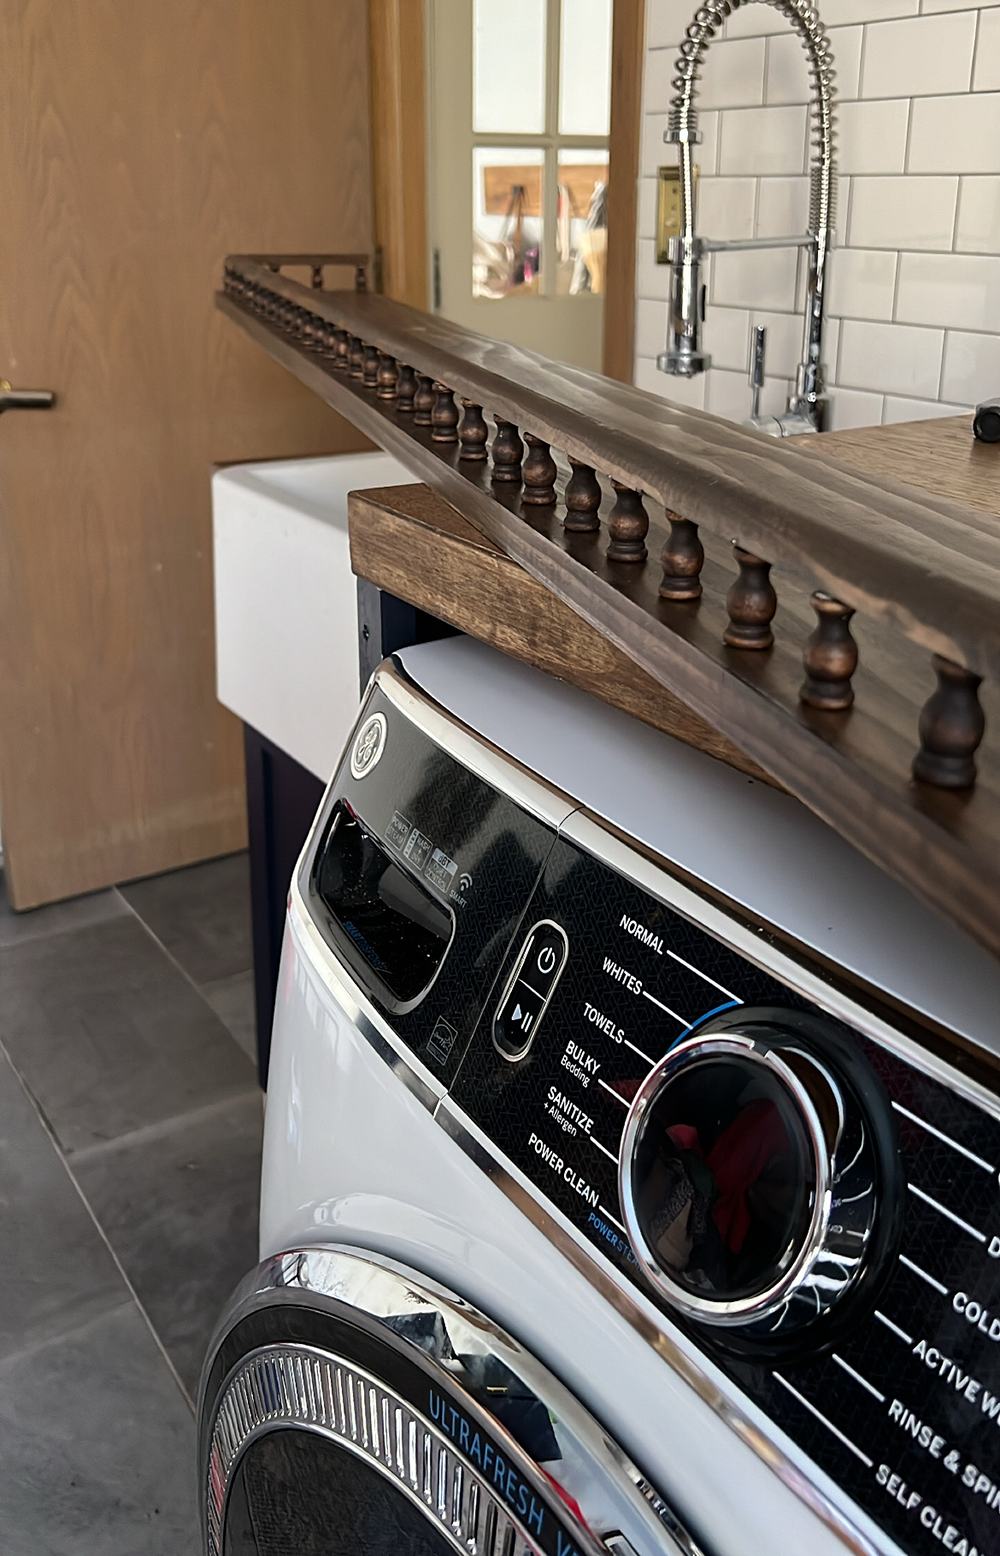
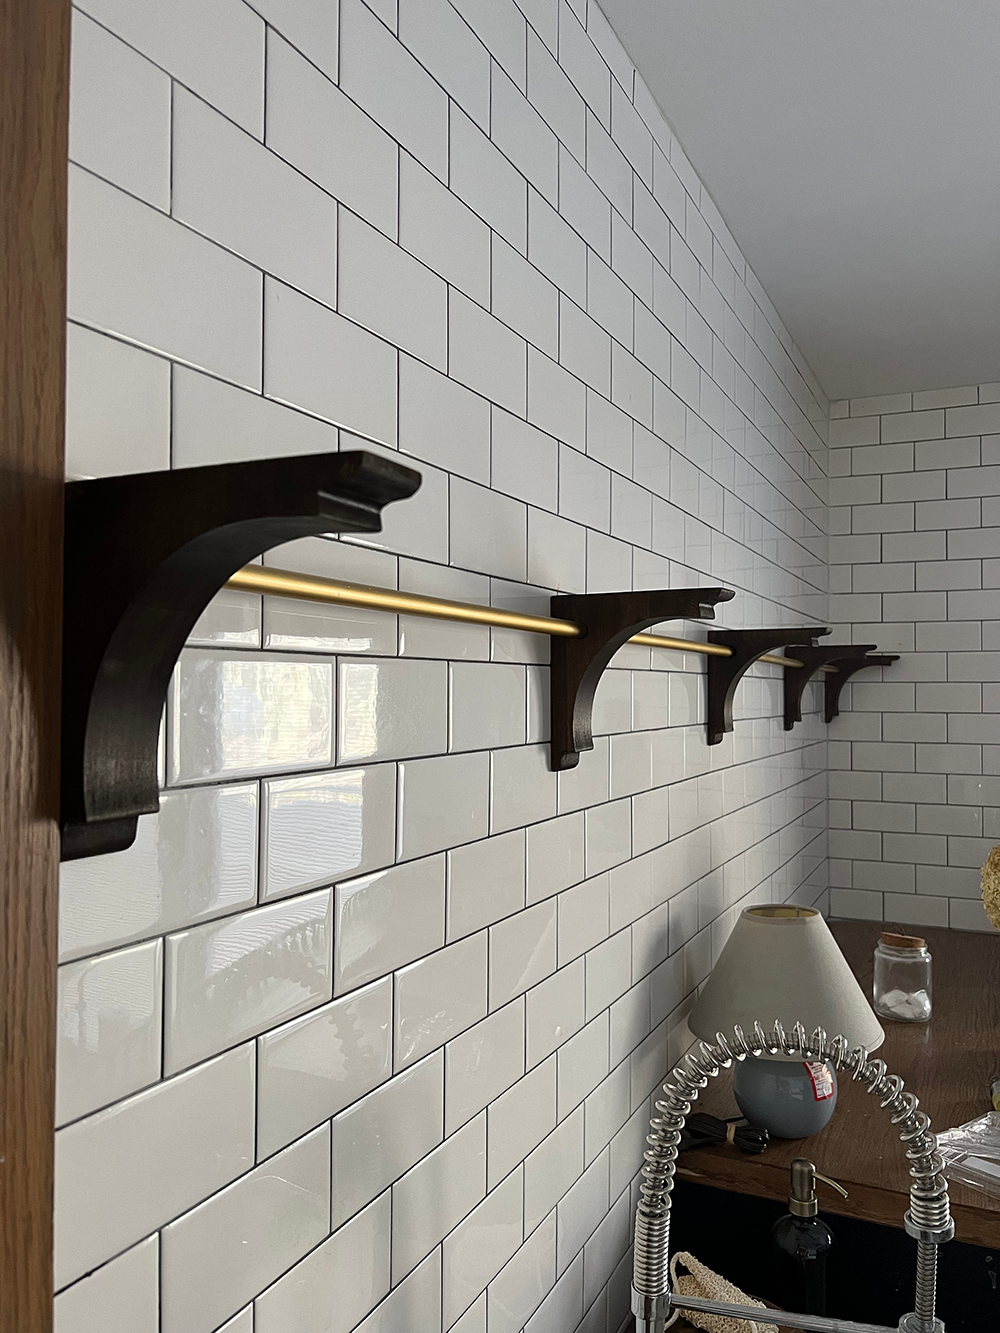
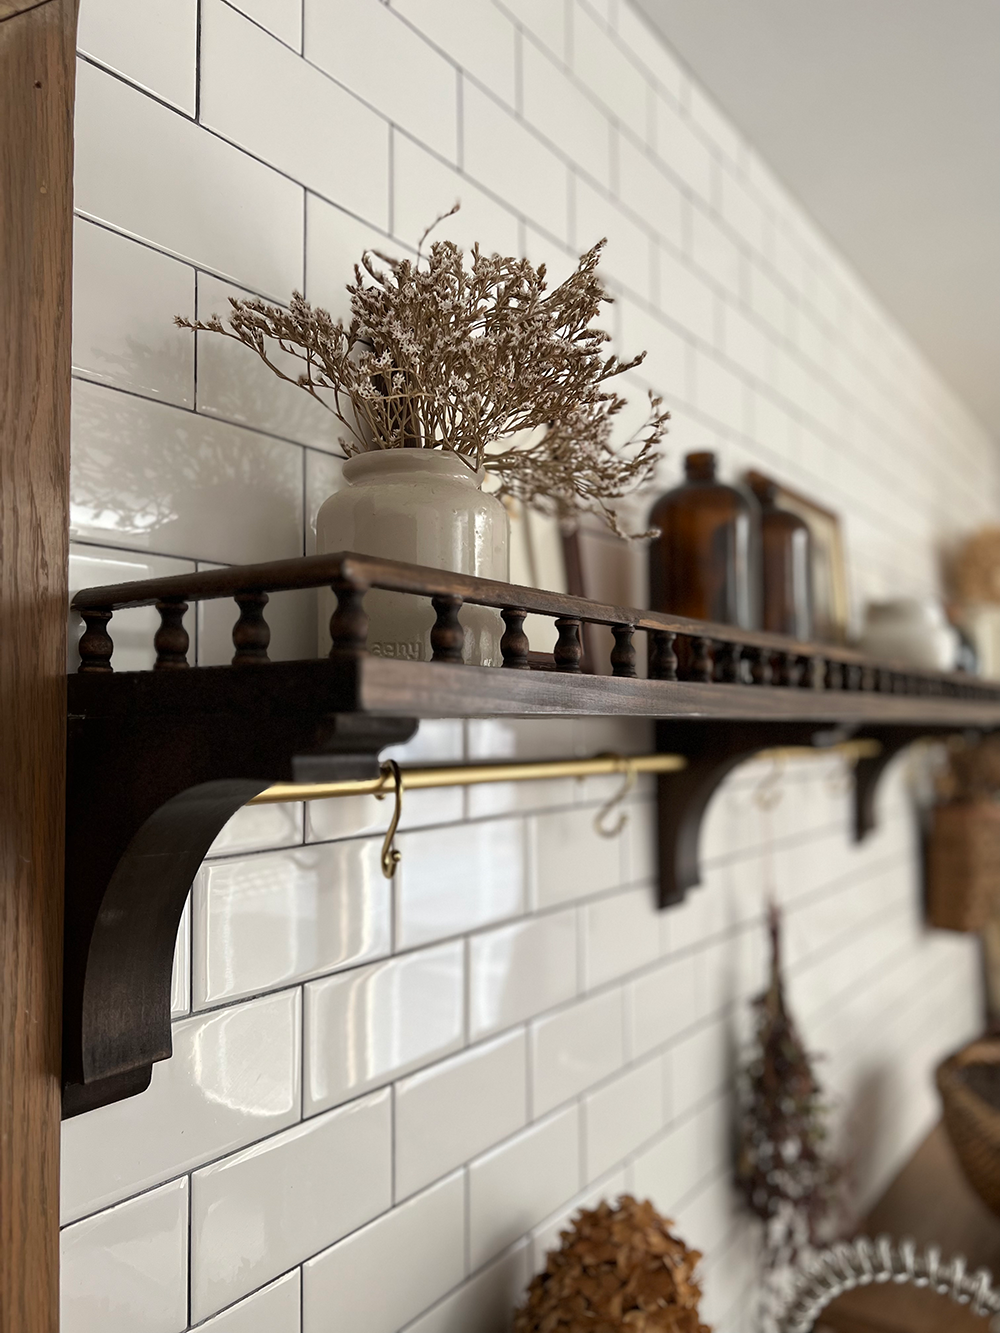
The more I look at it, it seems unbalanced and there’s more room for additional storage and functionality. So I came up with the idea to build a shelf with a wooden gallery rail on top and a hanging brass rail on the bottom.
I was inspired to build a wooden gallery rail after making dog food containers for Oakley from larger logs. Brass gallery rails have become very popular in design – we have one in our kitchen and I love it – but I wanted to give it a different twist. A lot of older antiques have this element which is a really beautiful detail, and I wanted to do it in a more modern way that was more in line with my style.
FIXTURES FOR SHELVES WITH WOODEN GALLERY RAILS
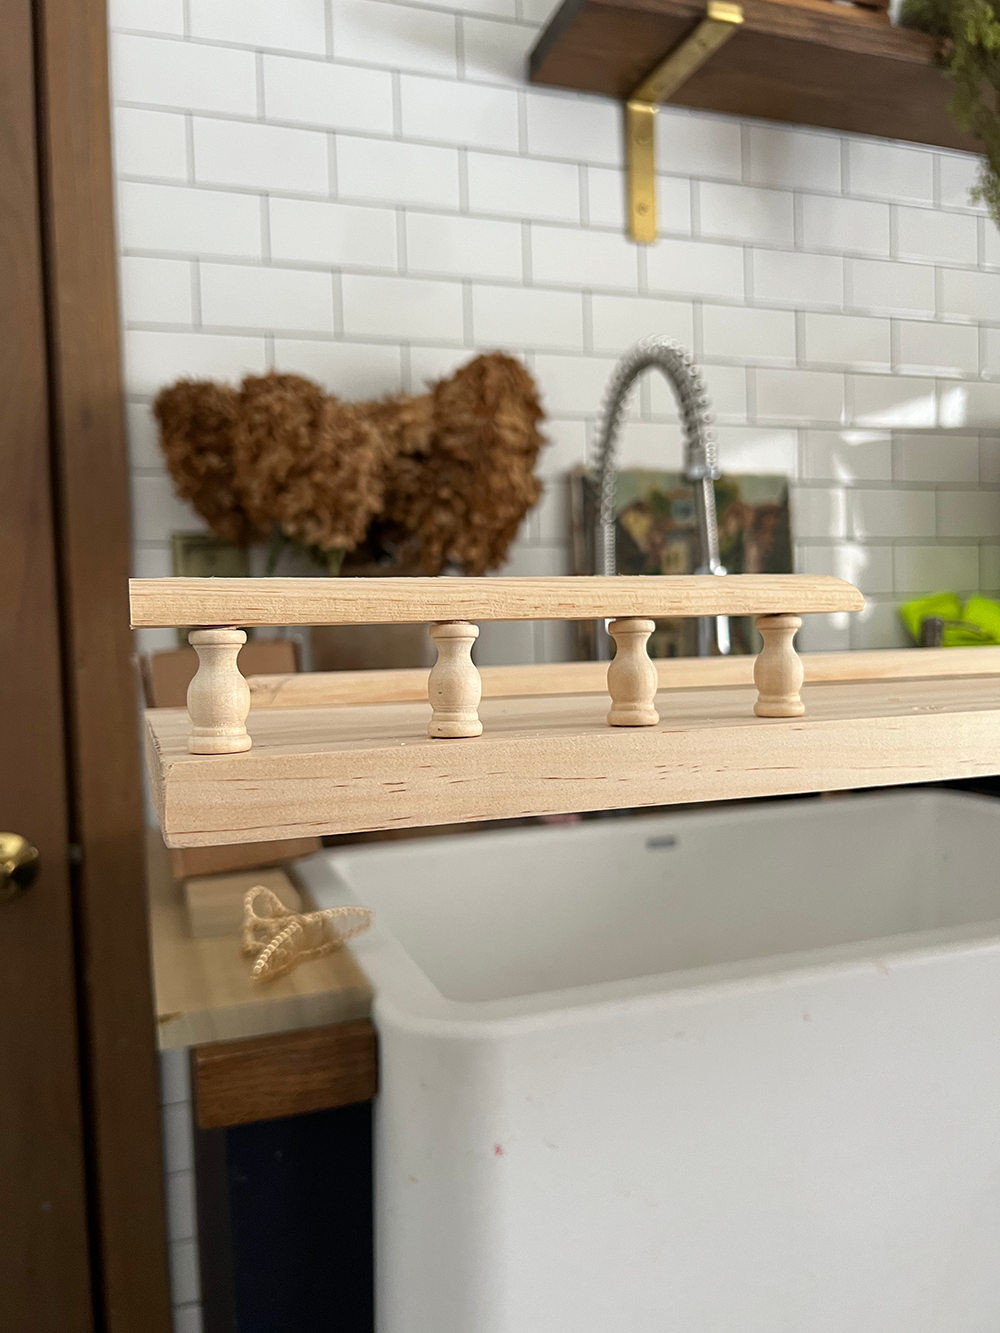
STEP 1
Drill the holes for your finals. You’ll want to measure your distance first – I spaced them 2.5″ apart from each other but you can do whatever feels best to you! I placed them about 1/2″ from the leading edge of the board.
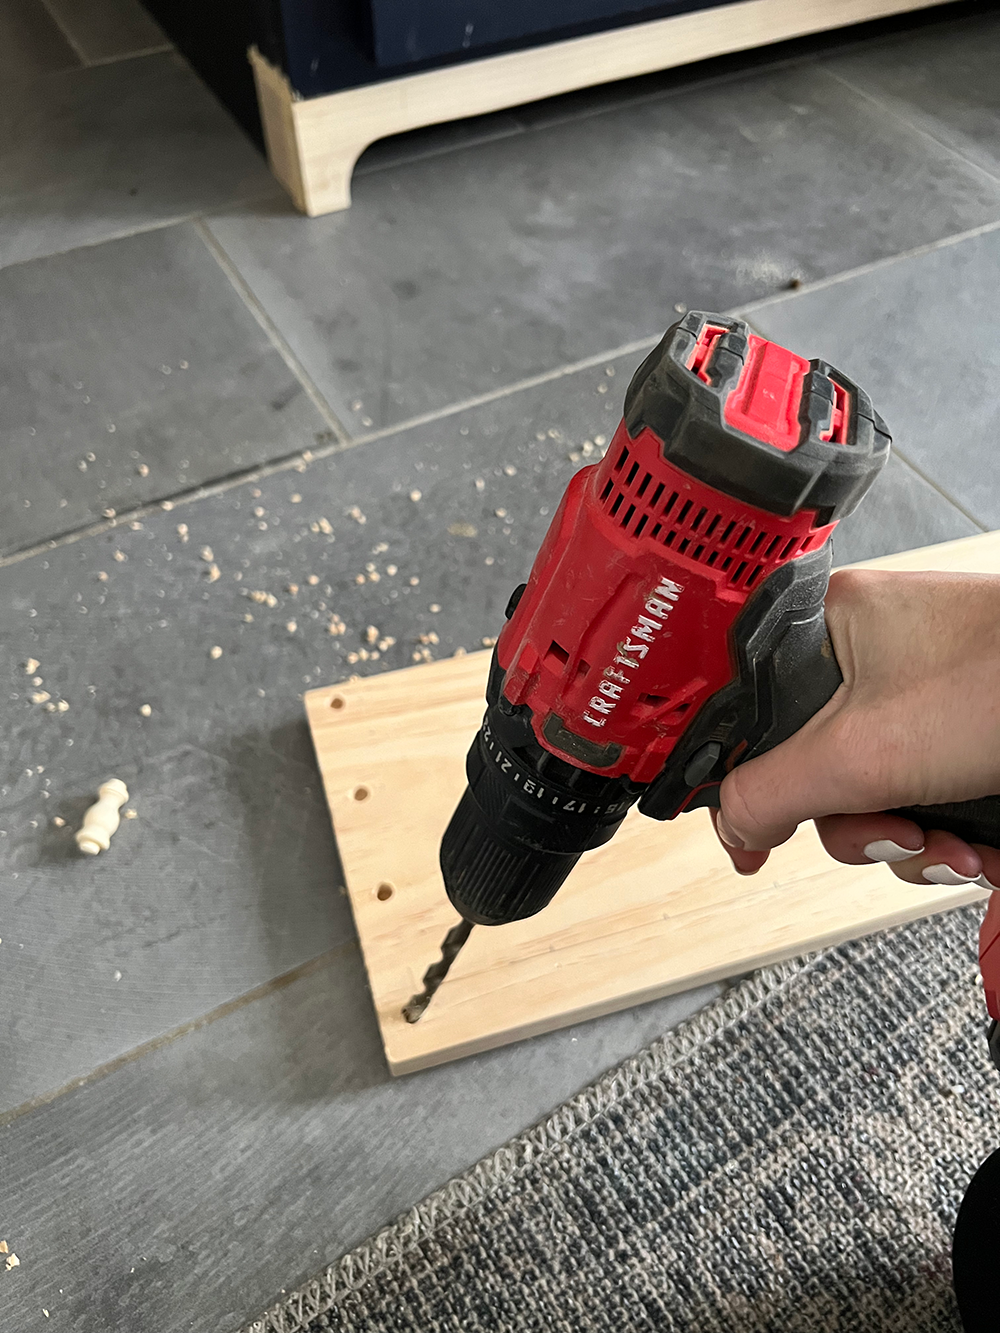
To drill the holes I used a 5/8″ drill bit. You could also use a spade but because of the pointy end I didn’t want to risk drilling into the wood!
STEP 2
Cut off the top of the final. It’s easy enough to drill into the shelfboard, but drilling into corner rounds can be tricky. So to avoid this I just trimmed the top of the finials so the corner rounds could be even.
I used a band saw to do this and it was super quick and easy! If necessary, you can then sand the top to get a perfectly smooth surface.
STEP 3
Cut and flatten your corner rounds. It helps to place your final in the hole to get a better idea of where the corner dial will sit. Then you can use a miter saw at a 45° angle to cut each piece.
STEP 4
Drill holes in your corbels. If you have a drill press that’s the easiest way to do it, but we didn’t so I used some clamps and a regular drill. The copper tubing I used for the “brass rail” was 1/2″ and I used a 5/16 spade bit for the holes.
I stained my corbel first but I recommend drilling first and then coloring!
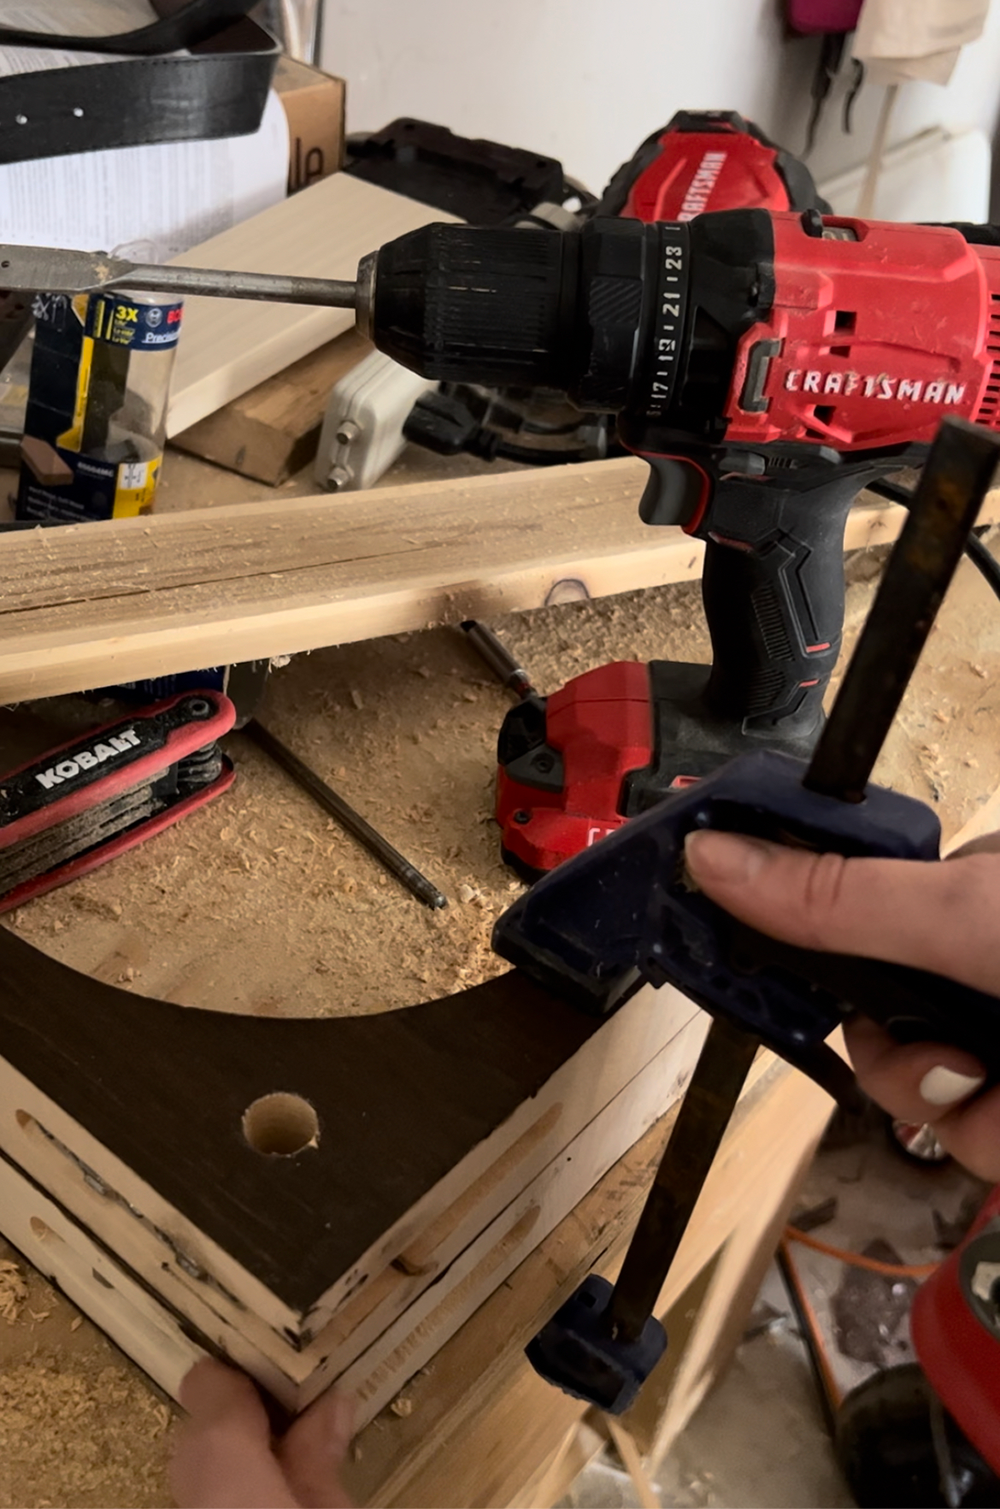
Begin by clamping the two corbels together. Make sure they are aligned the right way (i.e. the brackets on the back are facing the same way). Observe the center area of your corbel where you want the pipe to go and trace as straight through both corbels as possible.
After you finish the first two, take one of them and place it on the undrilled corbel. Use this as a template to drill down below. Repeat until all corbels have been drilled.
STEP 5
Now that you have all your wood cut and ready, it’s time to stain. I used a wood conditioner first which helps remove the spots and gives you a nice finish. You can apply it with a black foam brush.
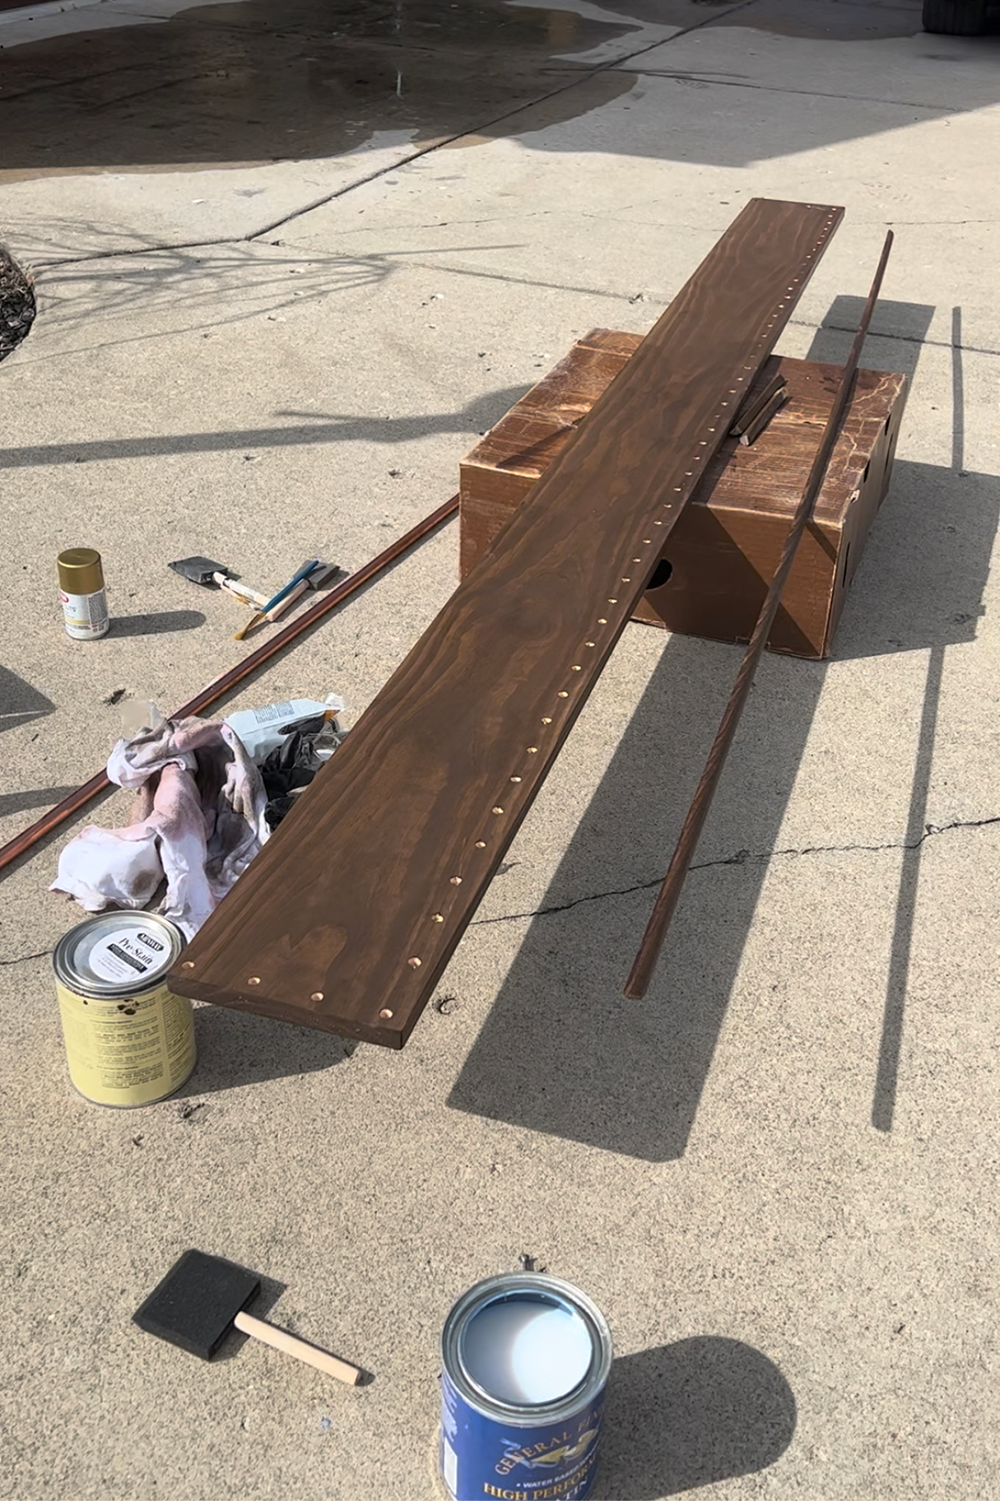
Then I used my favorite Dark Walnut Gel Stain to stain everything. I used coloring pads for the actual shelving and corbel and then used a small craft paint brush for the finish. Then I wiped the finish on a cloth to remove the excess.
STEP 6
After the stain has dried, apply a top coat. I used General Finishes High Performance Top Coat in Satin and only did one coat as it won’t get much action 😉
STEP 7
Cut your copper pipe. Before you cut, measure the length you need by laying both ends of the cord against the wall. This will give you a more precise measurement but you will have some wiggle room as the pipe will sit about an inch into the corbels.
We decided to have the pipe go through all 5 corbels in one piece but you can also cut the pipe into sections and hide the seams inside the corbel.
Cutting copper pipe is very easy with a small pipe cutter that you can get at a home improvement store.
STEP 8
Spray paint your pipes. I used this gold leaf spray paint and then this clear coat on top.

STEP 9
Build your wooden gallery rail! Glue your finials into the holes you drilled then glue the corners on top. This DAP Rapid Fuse glue is my favourite. It dries very quickly and is very durable!
STEP 10
Hang your shelves! Pull the pipe through the corbel and hook the corbel to the screw in the wall. We were able to use some of the existing holes and then had to drill new holes on both ends. To drill into the tiles, make sure you use a masonry drill bit!
We had a little trouble getting all 5 corbels into BOTH screws for each so we ended up using only one screw per corbel and it was still very sturdy.
STEP 11
Spray paint your hook to match the pipe. No matter what color you spray your pipe, make sure you use the same one for your hooks if they don’t match. I use these shower hooks and love the little ball detail they have.
Now for the fun part – time to decorate and enjoy your shelf!
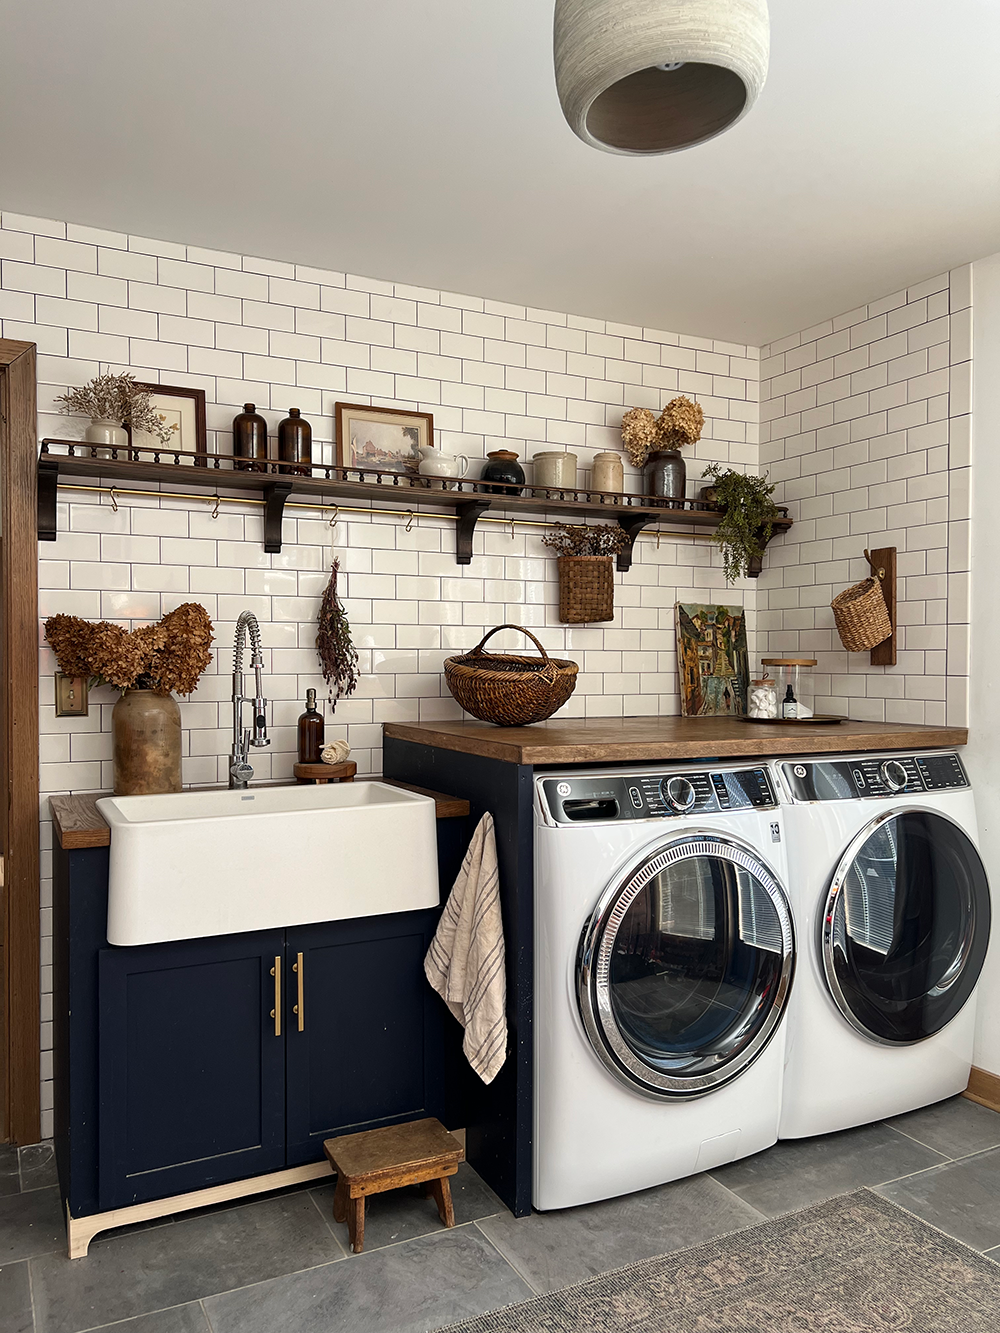
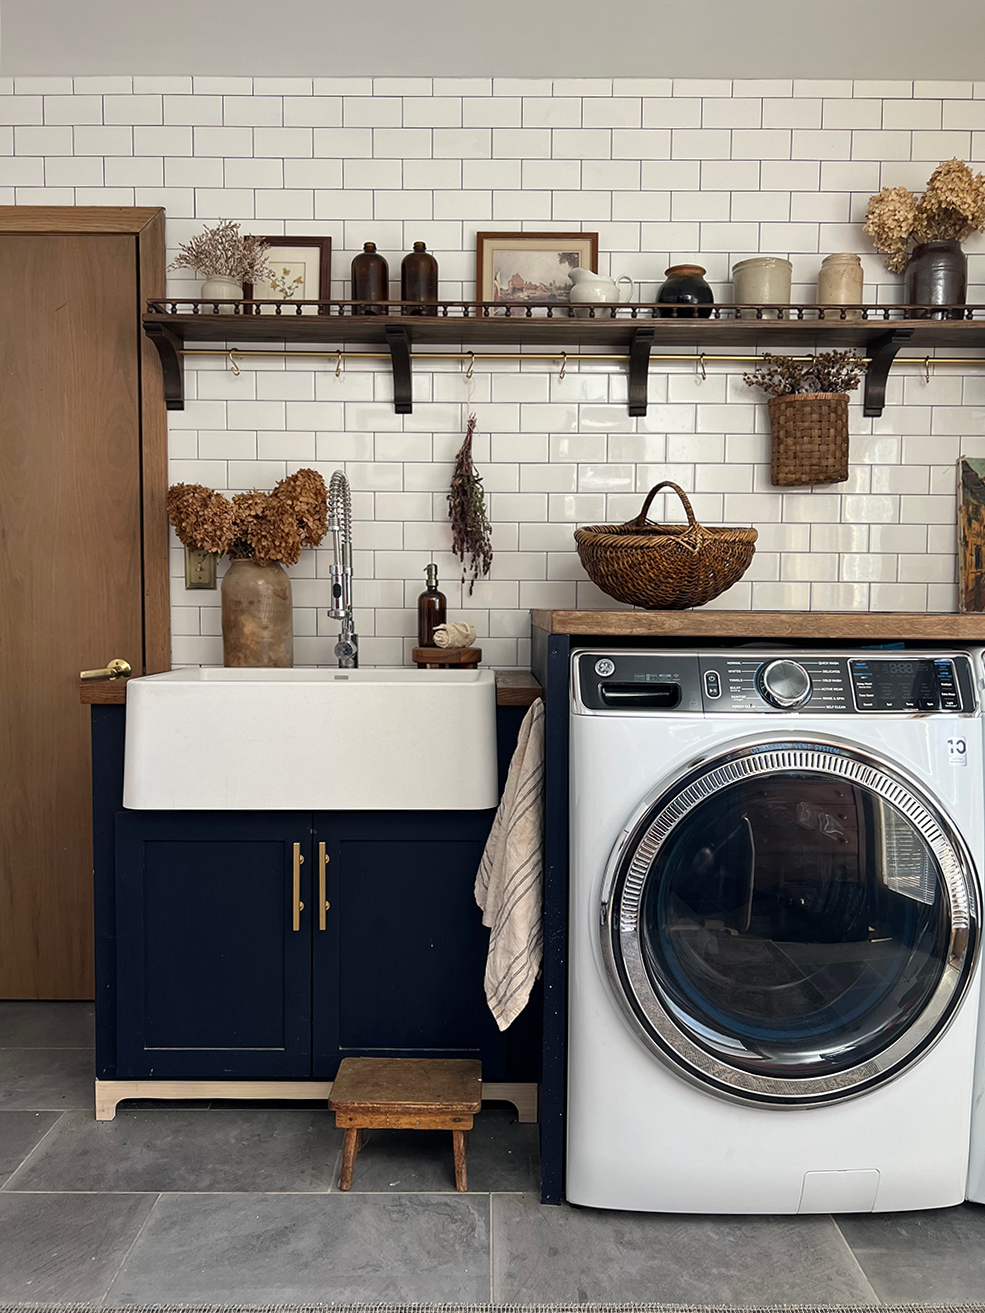
This wooden gallery rail shelf feels SO MUCH better than the real thing in this space. I love that it takes up an entire wall and has an extra brass rail underneath for hanging things. It is also much prettier and adds a lovely touch of charm and character to our laundry room.
What do you think? Are you going to build your own shelving with wooden gallery rails?