


If you’re looking for fun and easy butterfly crafts for your kids, check out these adorable paper butterflies! Made from any craft paper, these are perfect for kids of all ages and can easily be customized to their liking.
Whether you opt for brightly colored paper or prefer something softer, paper butterflies are a kids’ craft that’s sure to make your child smile. And with its simple construction, it’s the perfect activity for a rainy day or lazy afternoon.
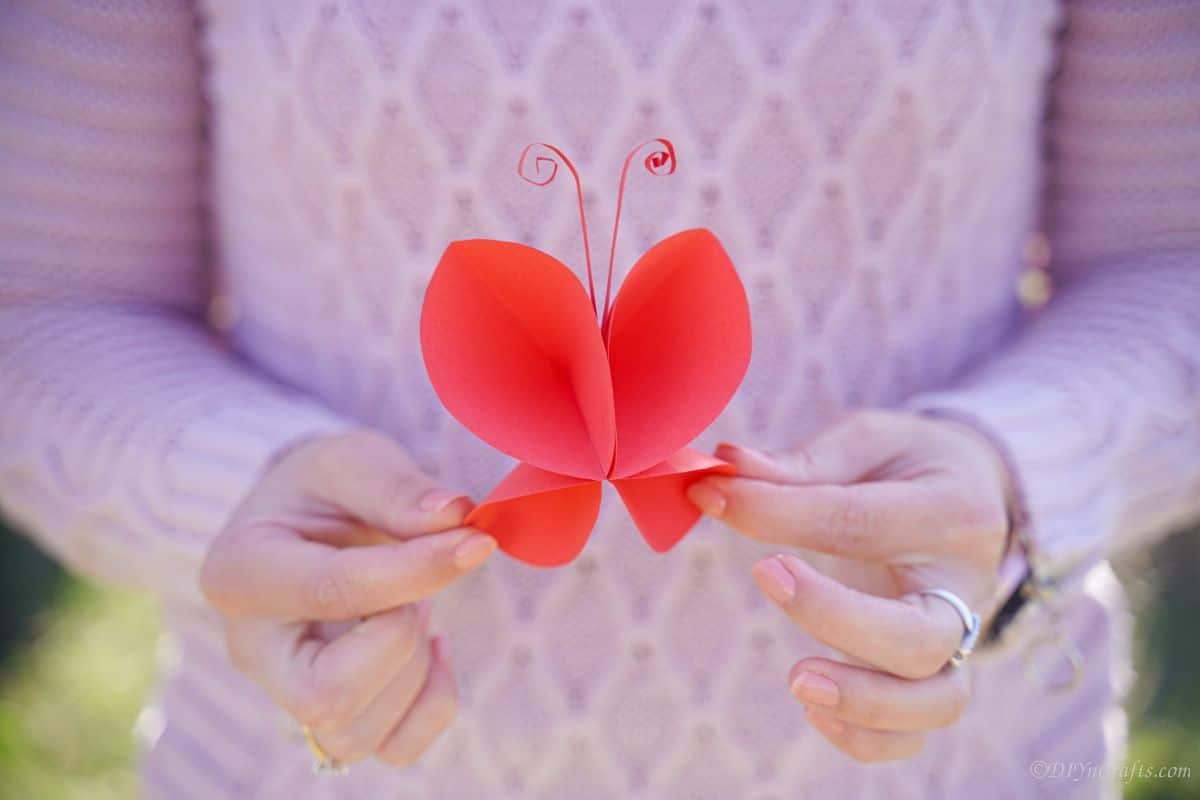
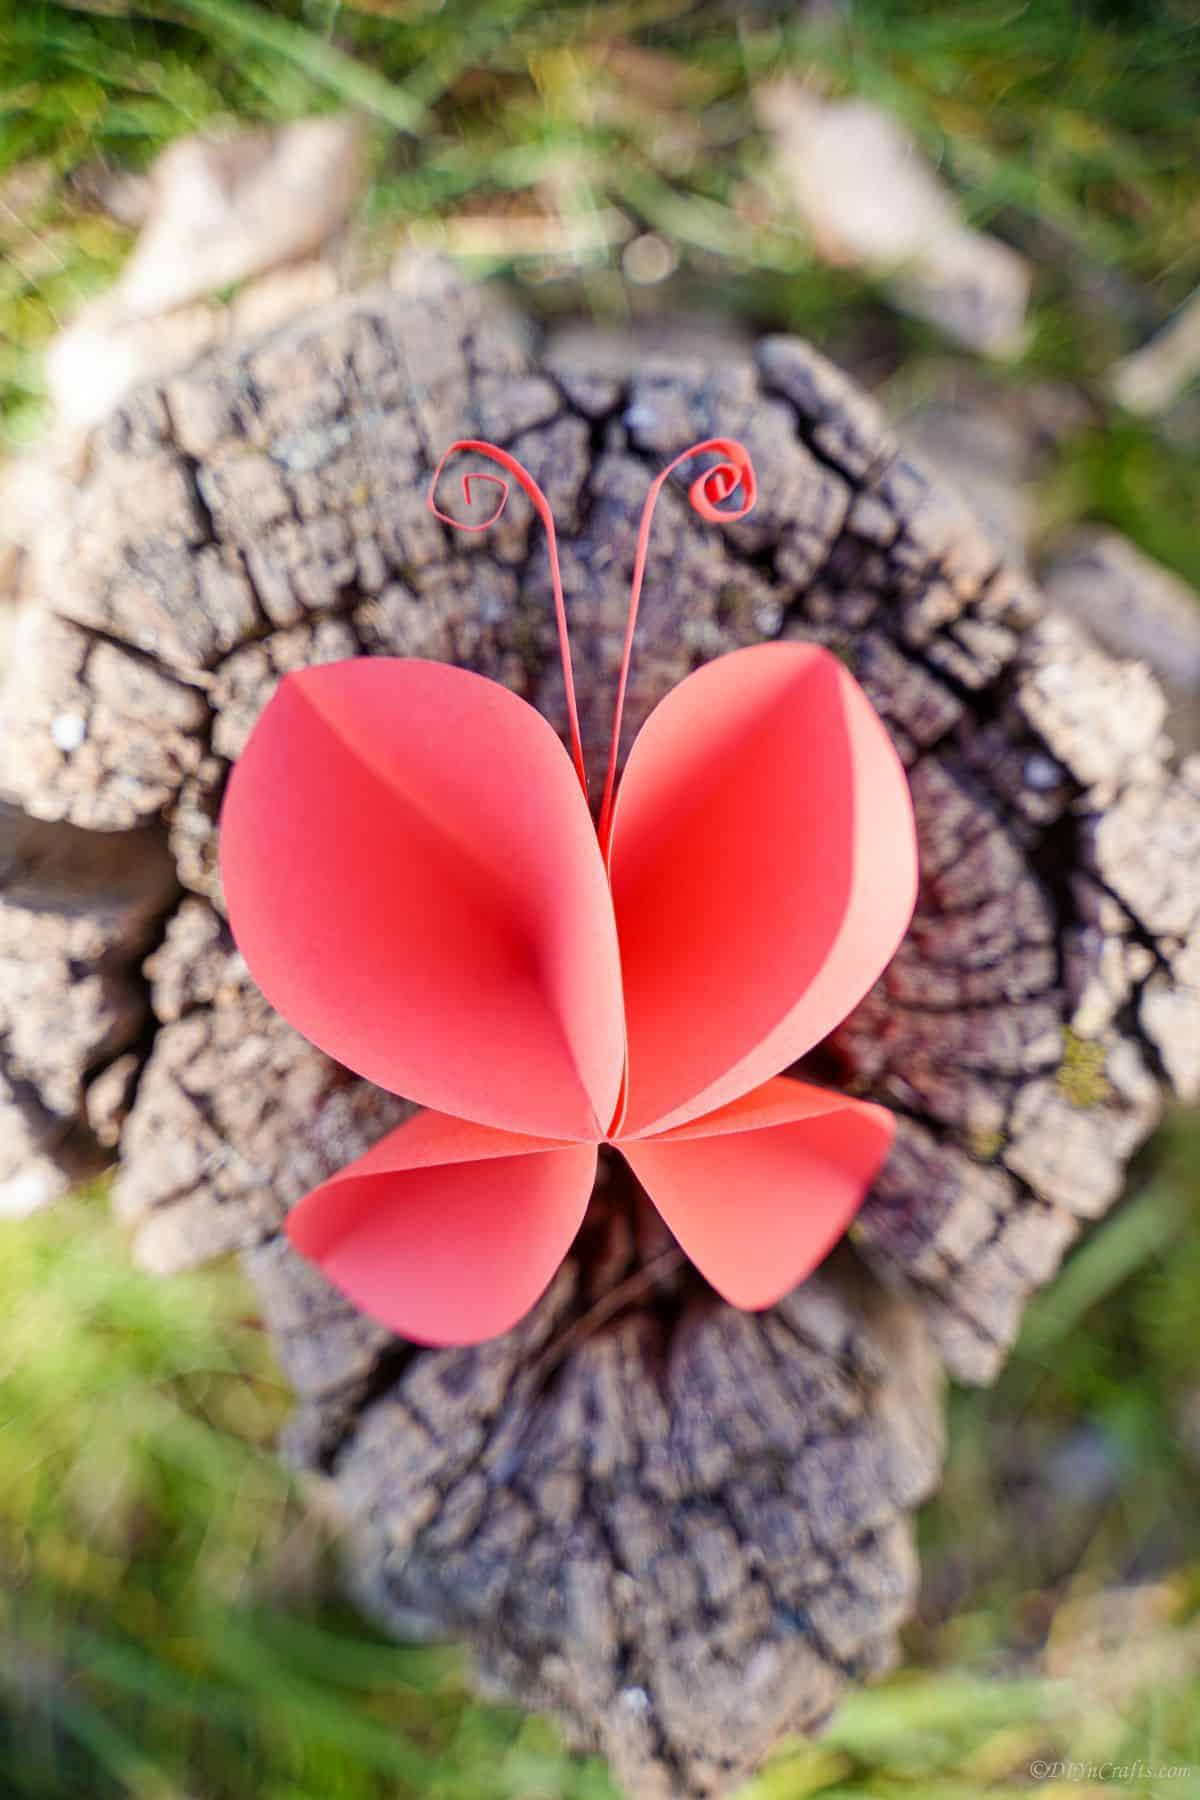
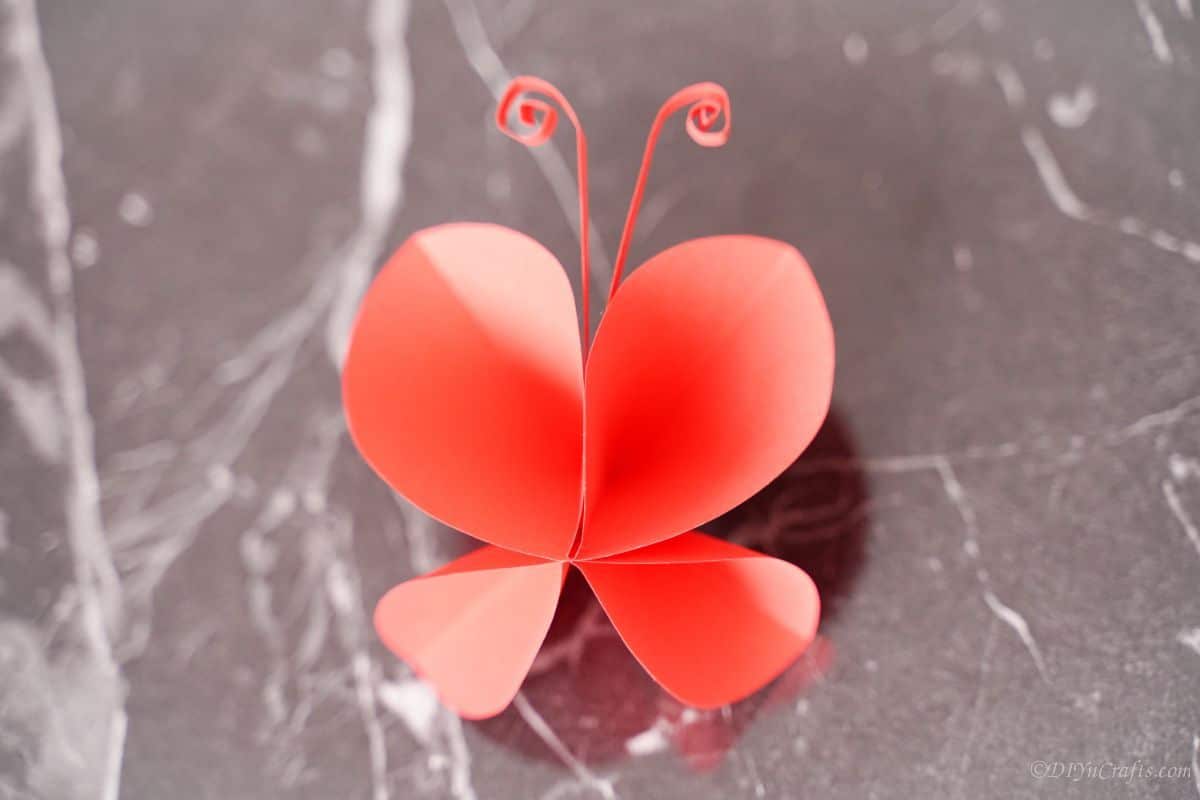
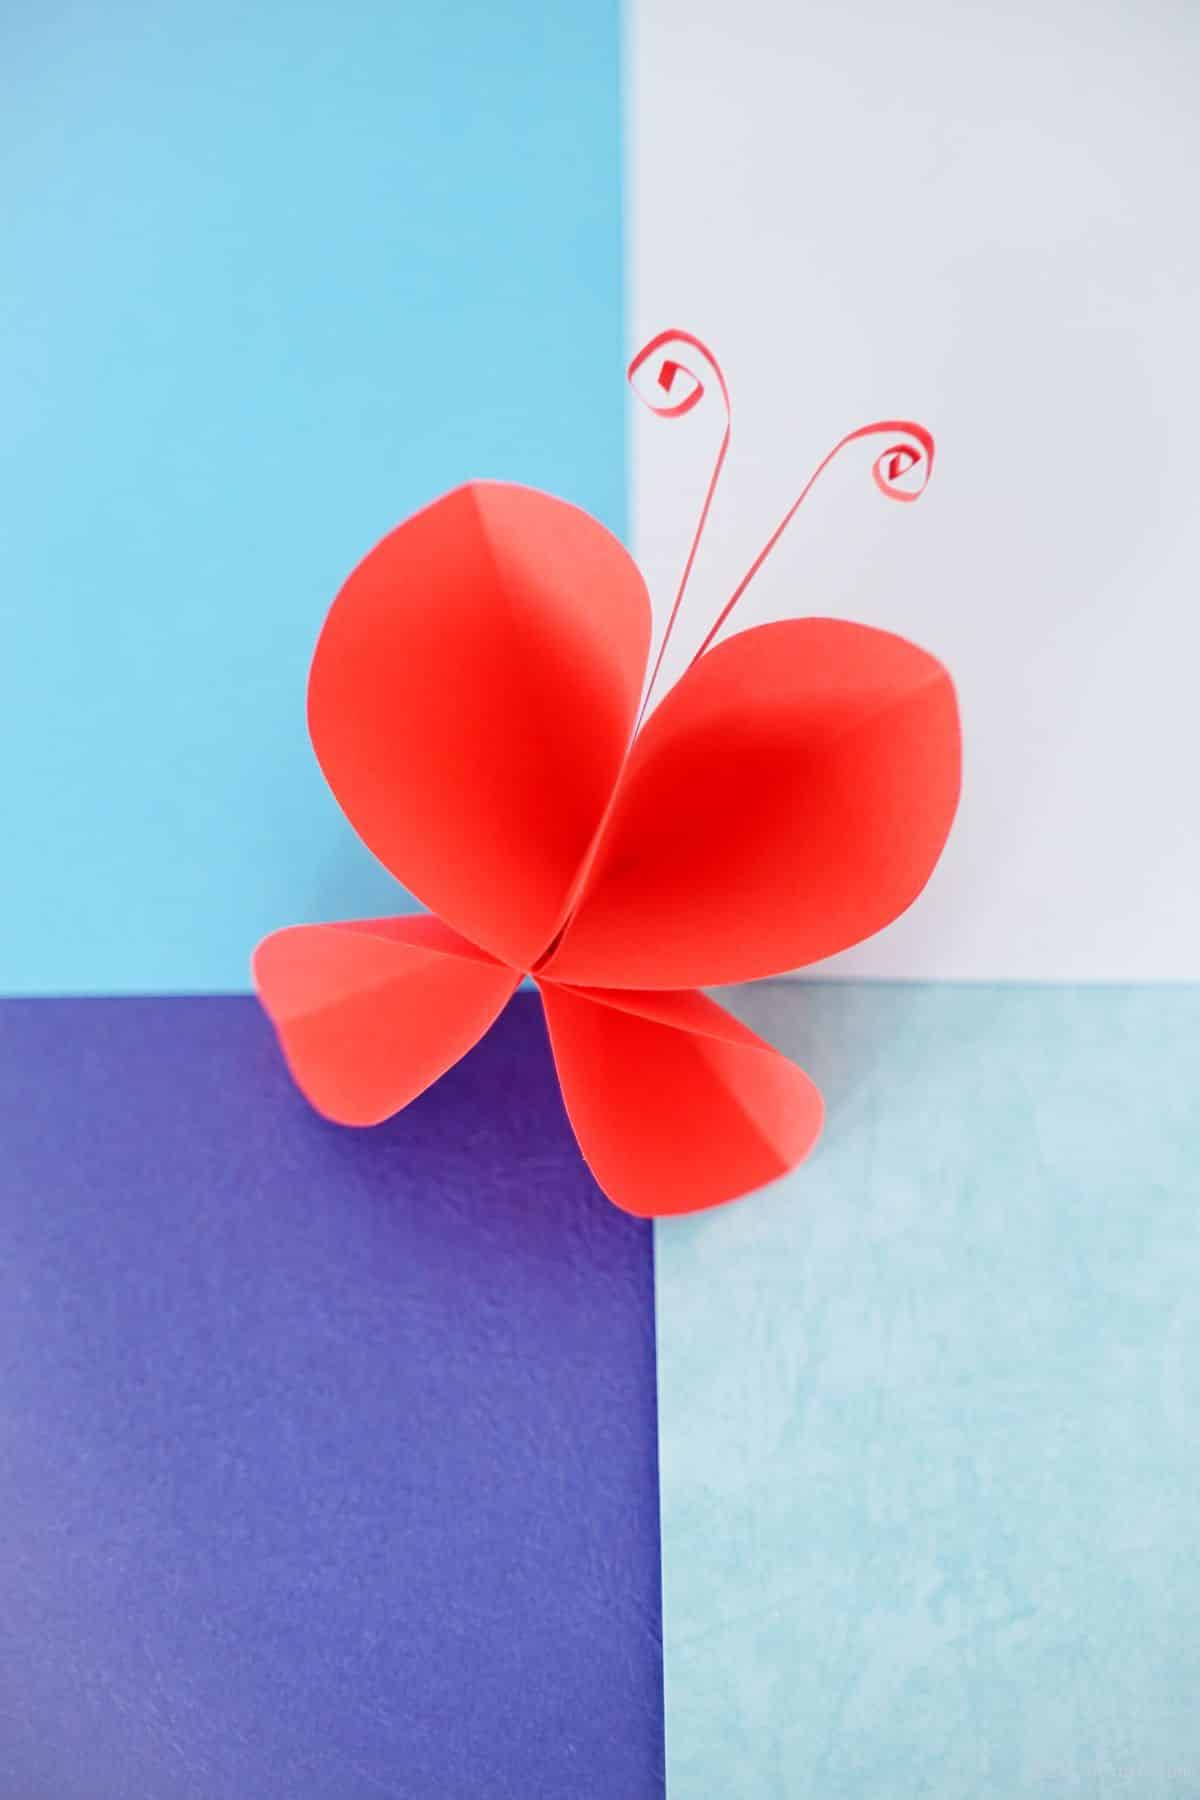
Paper Butterfly Kids Craft
These paper crafts are perfect for young and old alike. Simple, easy, and most importantly, lots of fun! All you need is paper, scissors and a few minutes of time. Kids will love making these paper butterflies to decorate around the house or use as toys.
I love butterflies, and luckily, so do my kids. Another fun idea is this colorful framed butterfly or even this super cute and easy plastic spoon butterfly. Both are adorable and definitely kid friendly!
What Paper Should I Use to Make This?
I always recommend using thicker paper. If you use thick paper, it will hold its shape and won’t tear easily. You can use construction paper, card stock, or even Bristol board. I avoid using thinner paper, such as printer paper because it is more likely to rip and get its shape and prevent the butterfly from looking like a butterfly.
If you want to add an extra touch to your butterflies, you can use metallic paper or even patterned scrapbook paper. Make sure whatever paper you use is thick enough so it doesn’t rip. Good craft paper should be thick enough to hold its shape, but not so thick that you have trouble folding it into shape.
How Can I Seal It So It Lasts Longer?
After creating the butterfly, you can use Mod Podge or even hairspray to seal it. This will help the colors stay vibrant and prevent the paper from tearing. You can also use a spray sealer if you prefer.
Similar Projects: Amazing Rustic Rope Basket Tutorial
To seal with Mod Podge, simply apply a thin layer over the entire butterfly. Allow it to dry completely before handling. To seal with hairspray, simply spray the butterfly with hairspray and allow it to dry.
Another way to seal these paper butterflies is to use lamination. You can laminate paper using very thin laminated paper. This will keep you able to manipulate the paper into place but will also seal it. It might help to cut out the circles and fold them before laminating, but this is one option that might be a little more difficult to work with than the others.
Can I Decorate Butterflies?
Yes! You can decorate the butterfly however you like. If you want to add some extra design and wow effect to your butterfly. Below are some ideas that I think are perfect for this project.
- You can use metallic paper or even patterned scrapbook paper.
- Use markers, crayons, paint or even glitter to decorate the wings or the edges.
- Add some foil, cloth, or ribbon to the end of the antenna or around the edges.
- For a special addition, you can even add some googly eyes for the butterfly or make one using felt or construction paper.
- Create designs on the wings with paint swirls or metallic markers.
Similar Projects: Beautiful Autumn Pinecone Wreath Decoration
The possibilities are endless! Just use your imagination and see what you like. The best part is that it’s practically free, perfect for using up extra crafting supplies from previous projects.
What Can It Be Used For?
This butterfly can be used for anything! I love how versatile a craft like this is. Below are a few ideas that come to mind that are ideal for your paper butterflies.
- You can use it as a toy when playing pretend with your kids or even as an example when teaching caterpillar and butterfly lessons.
- Use it as a decoration in a classroom, child’s bedroom, or birthday party. Just add a bit of fishing line and hang it from the ceiling to make it look like it’s floating in the area.
- They can also be placed on a wall with poster putty as part of a butterfly flock for a unique look.
- If you make a lot of them, you can string them together to make a butterfly or cell phone garland.
- You can also use this as part of a butterfly themed birthday party or baby shower.
Be creative and have fun! Make each butterfly completely unique, or copy the exact same design on each one. Whatever you do, they’re sure to be a lot of fun to make.
Required Supplies
How to Make a Paper Butterfly
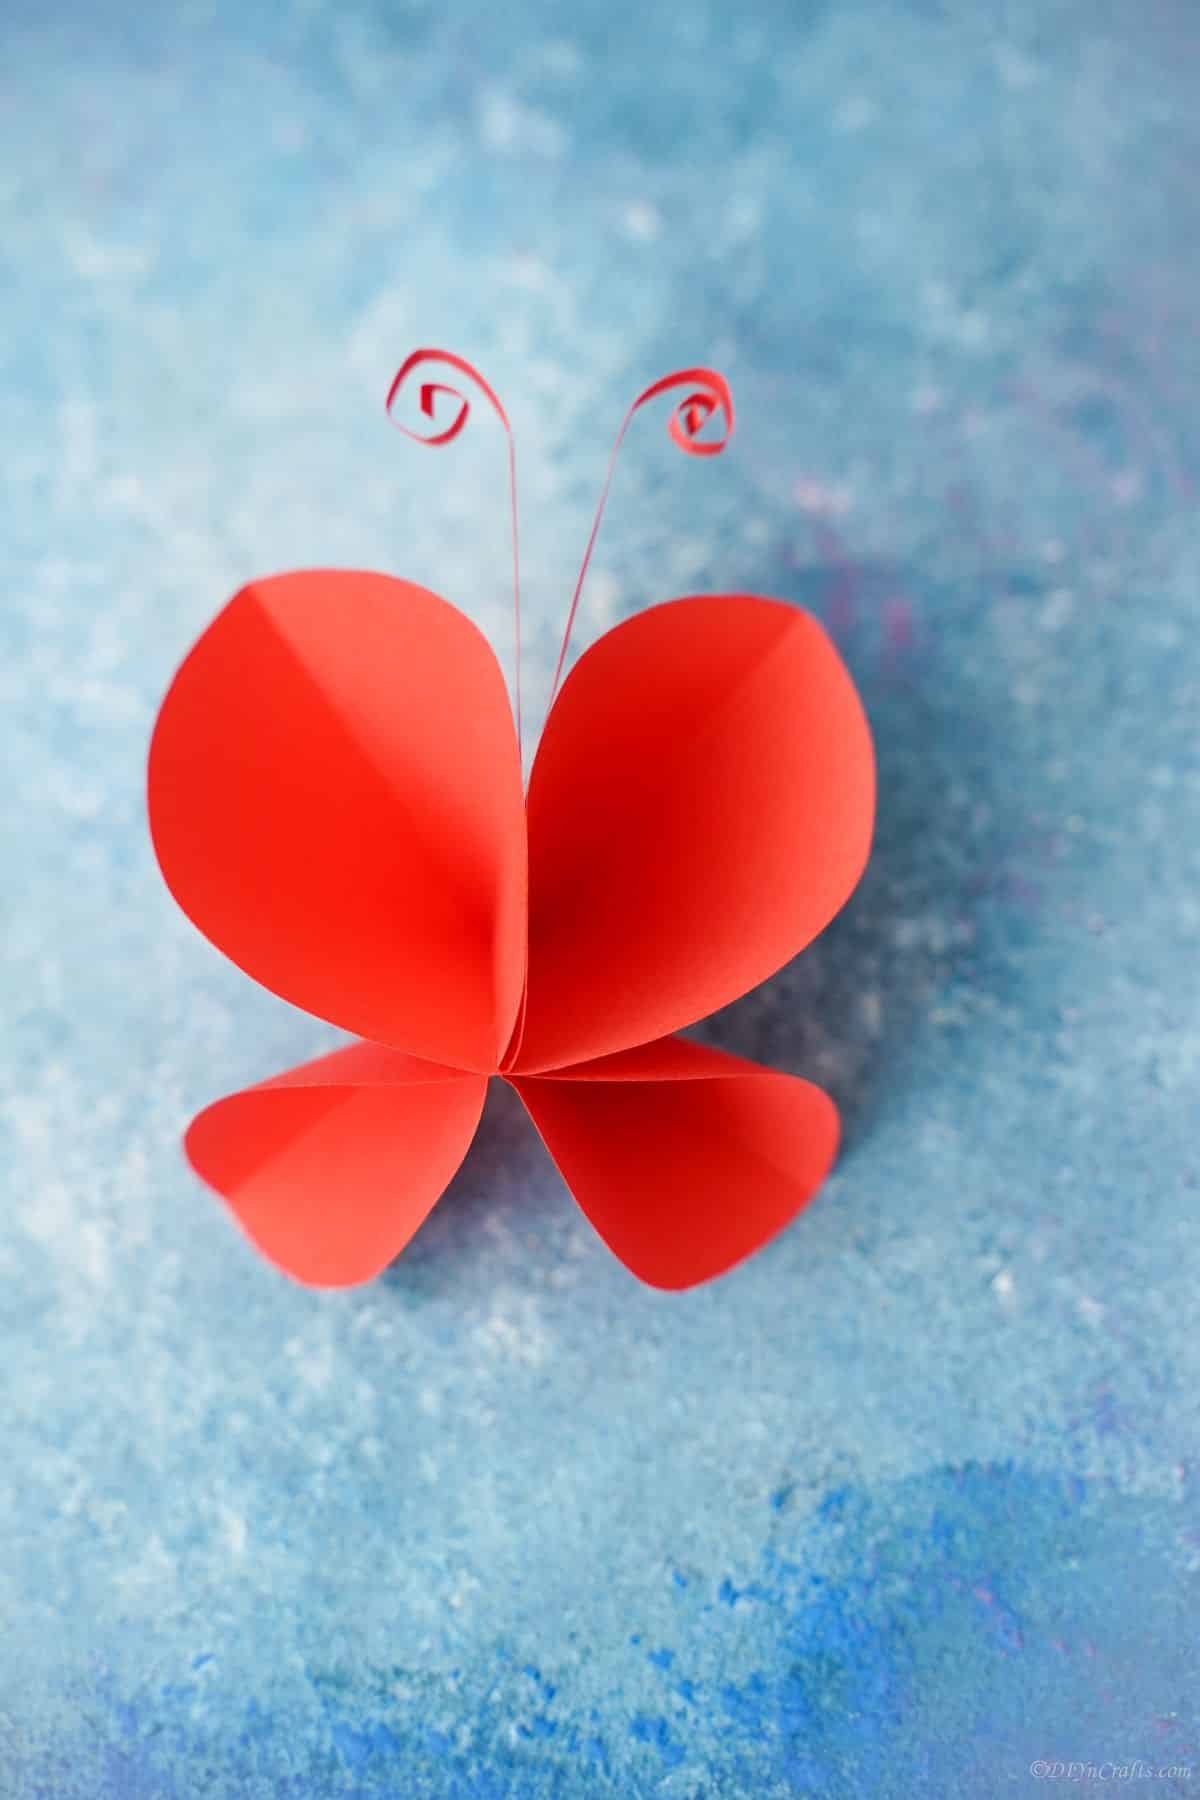
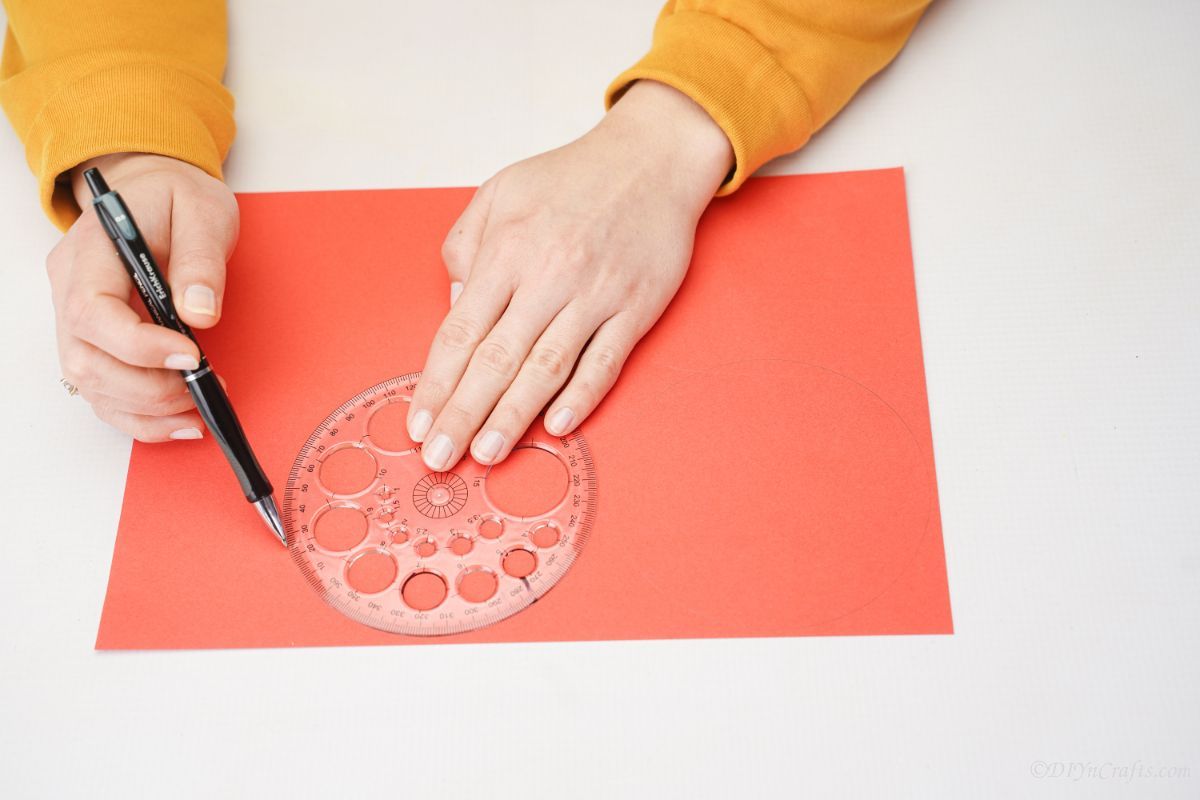
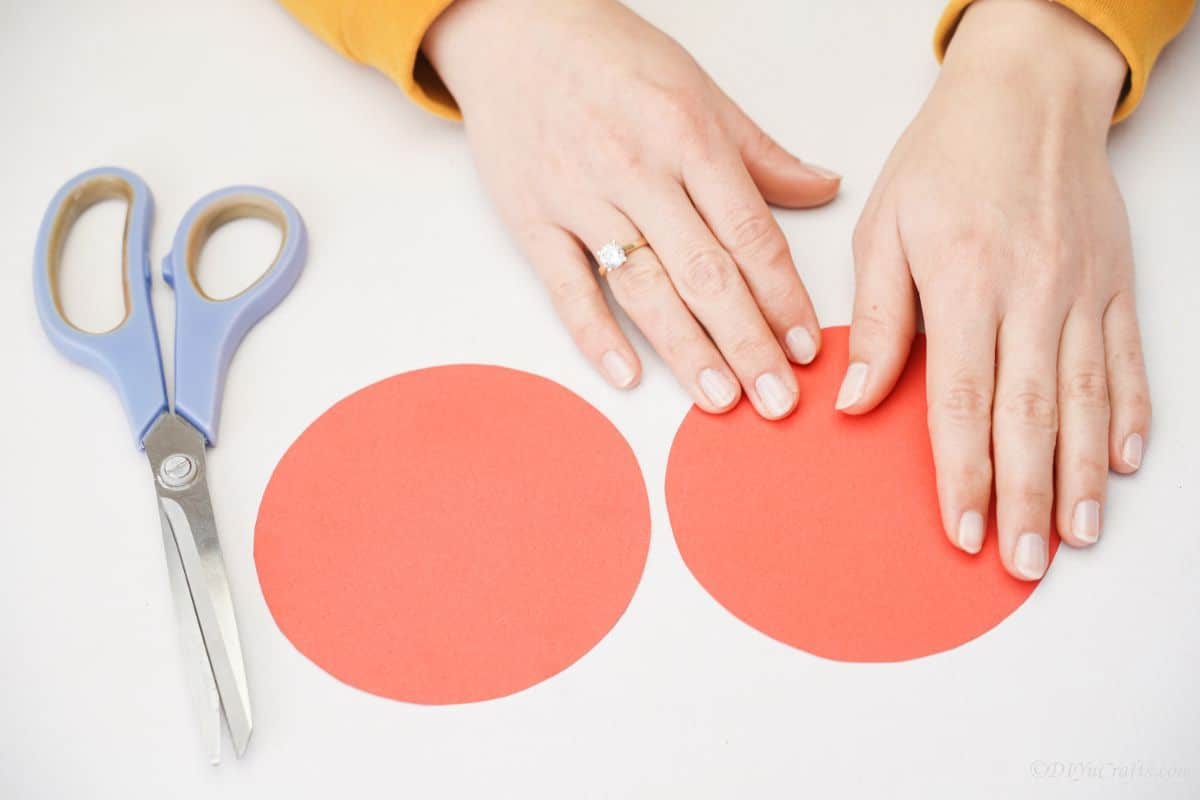
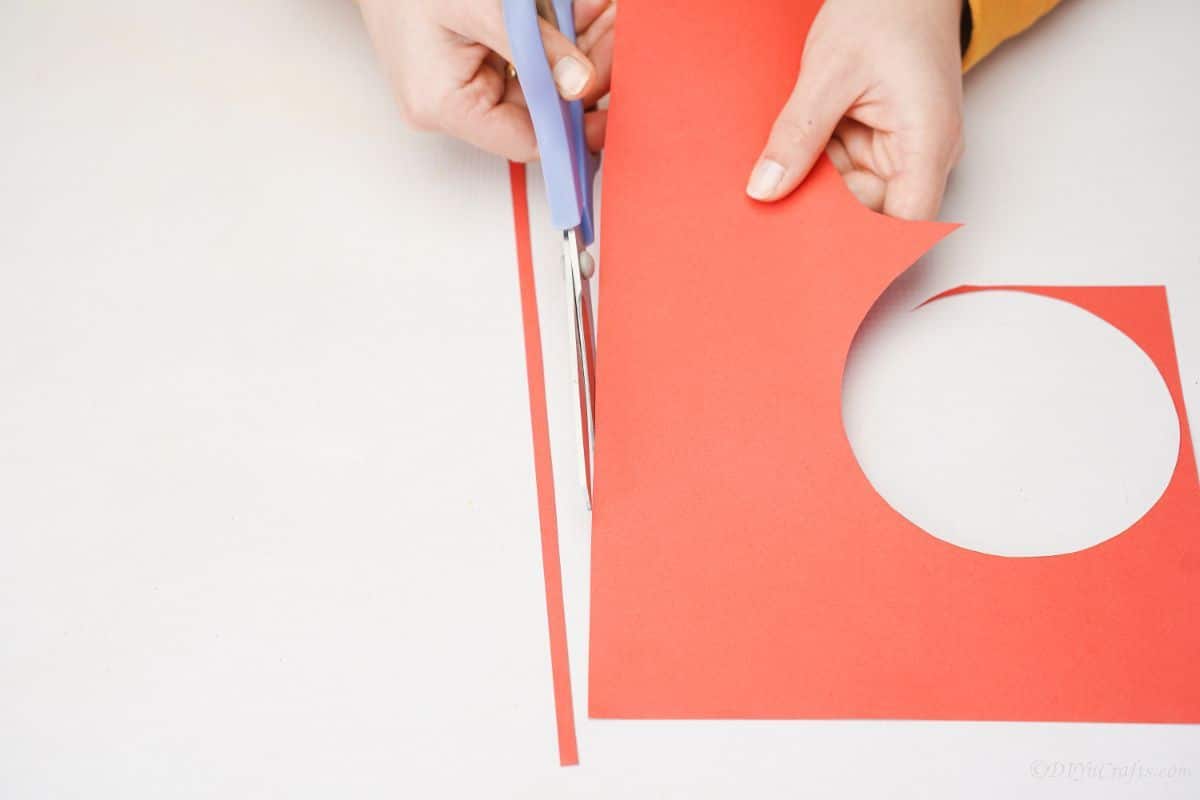
On a sheet of lightweight cardstock or your favorite craft paper, trace two circles about 6 inches wide. This is the base for your butterfly. On that same paper, you’ll also want to cut an extra piece of paper ¼’ wide and 8″ long. This is for the antenna.
Fold one of the circles in half, then in half again to form a small rounded triangle. This is just to fold the paper and help divide it for your butterfly wings.
Similar Projects: Fun Scandinavian Easter Egg Gnomes Crafts
Unfold the circle so it is only folded in half once and then set aside.
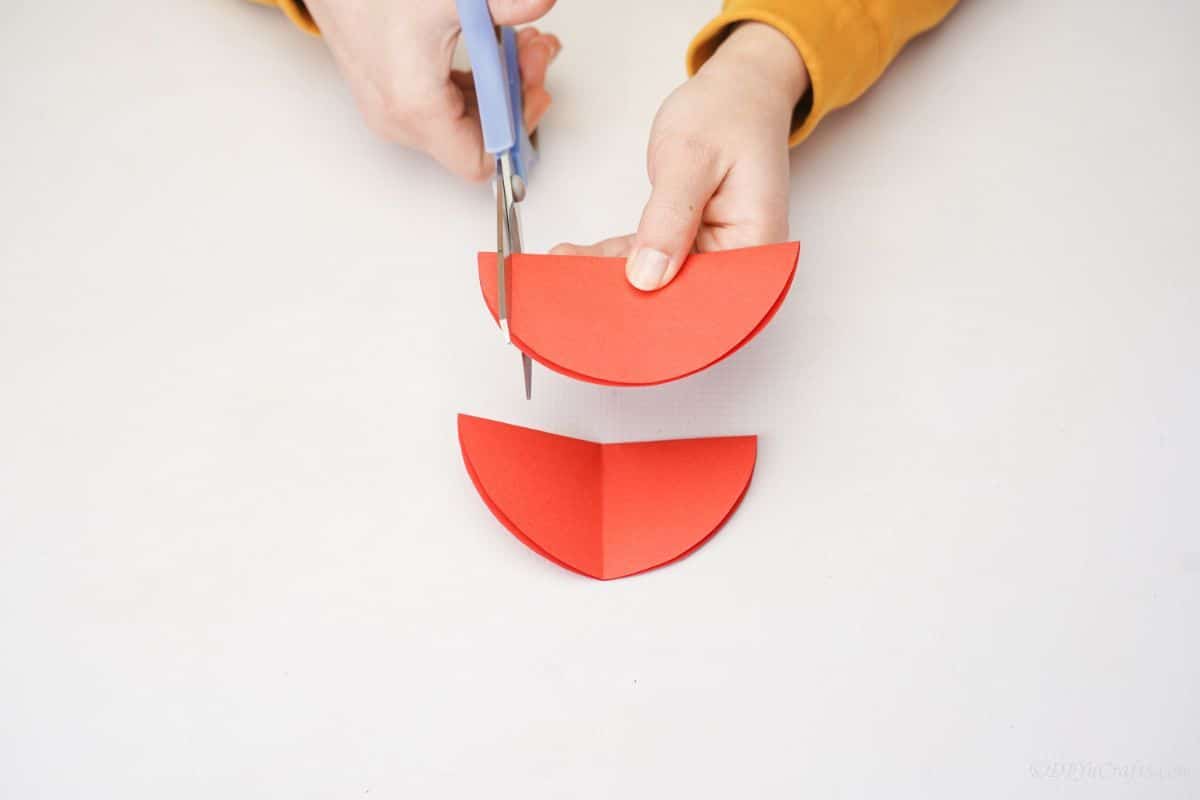
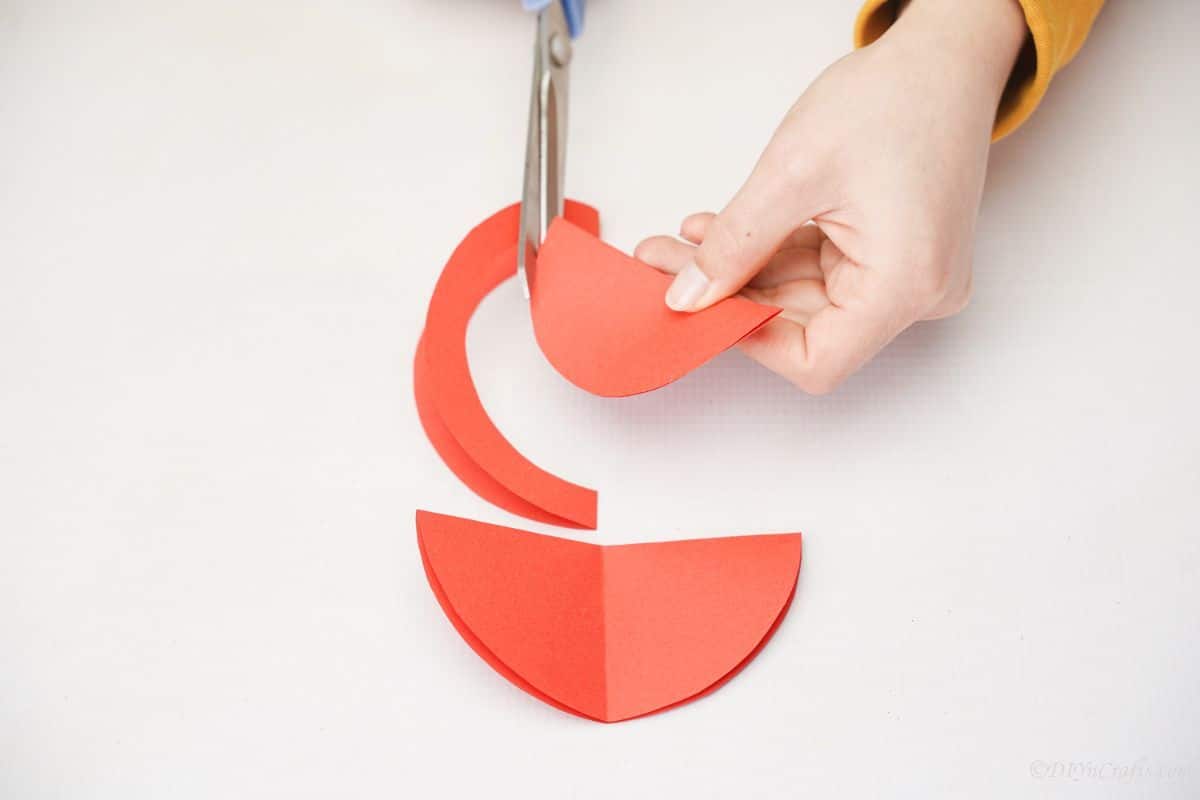
Fold the second paper circle in half, then cut about ½” from it to make the same shape, but smaller.
Now, repeat the same folding and unfolding process you did above for the first section.
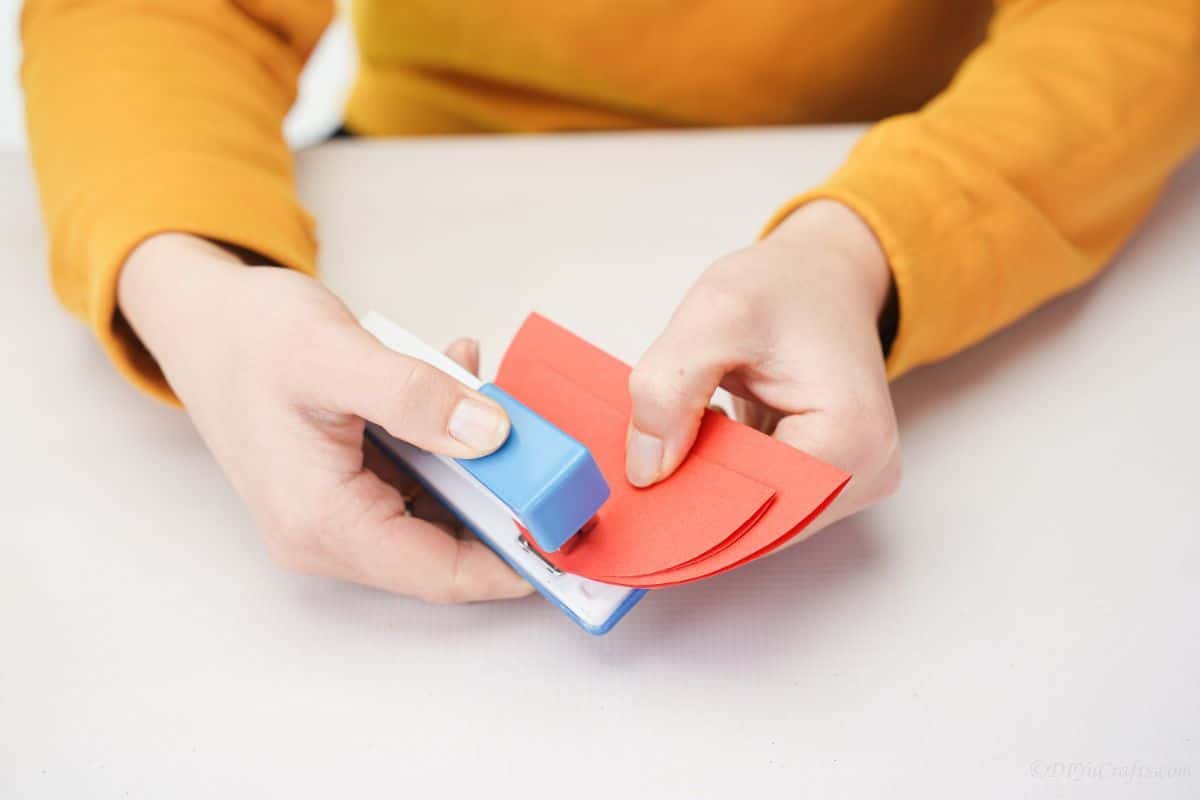
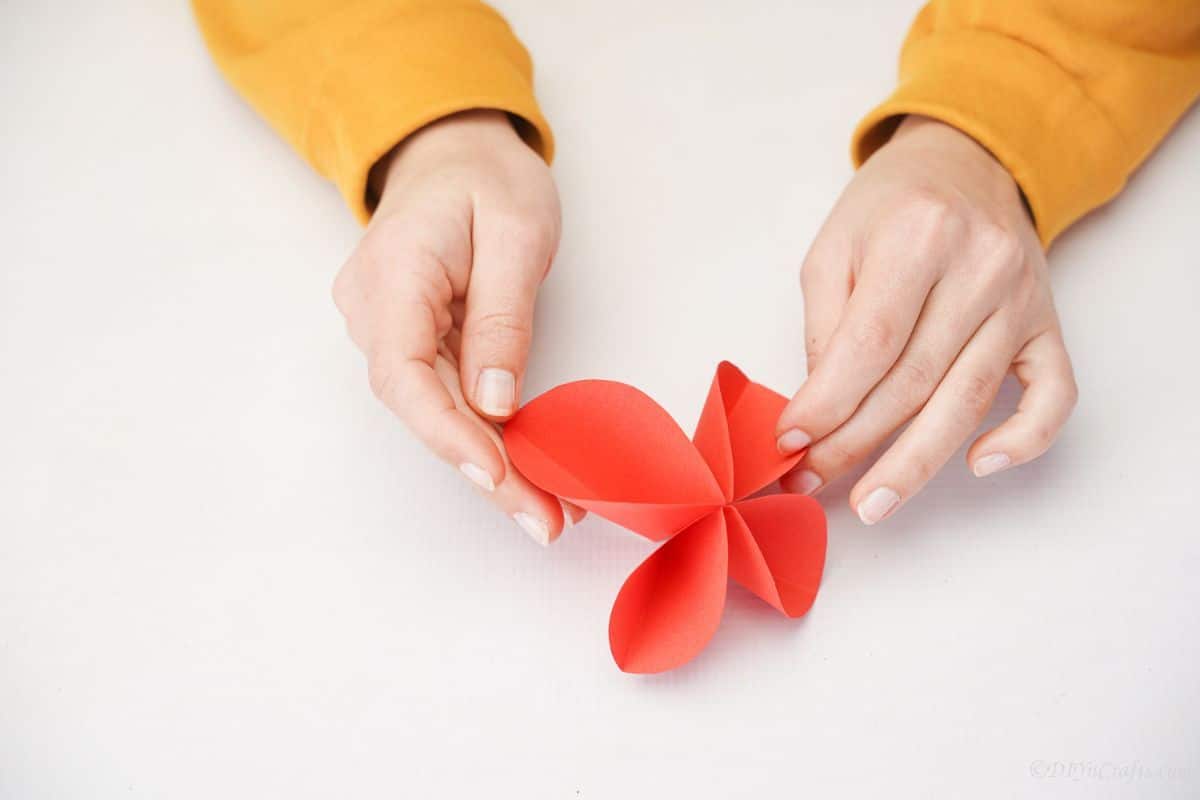
Lay the papers together, with the smaller half circle on top of the larger one, so that the edges are even.
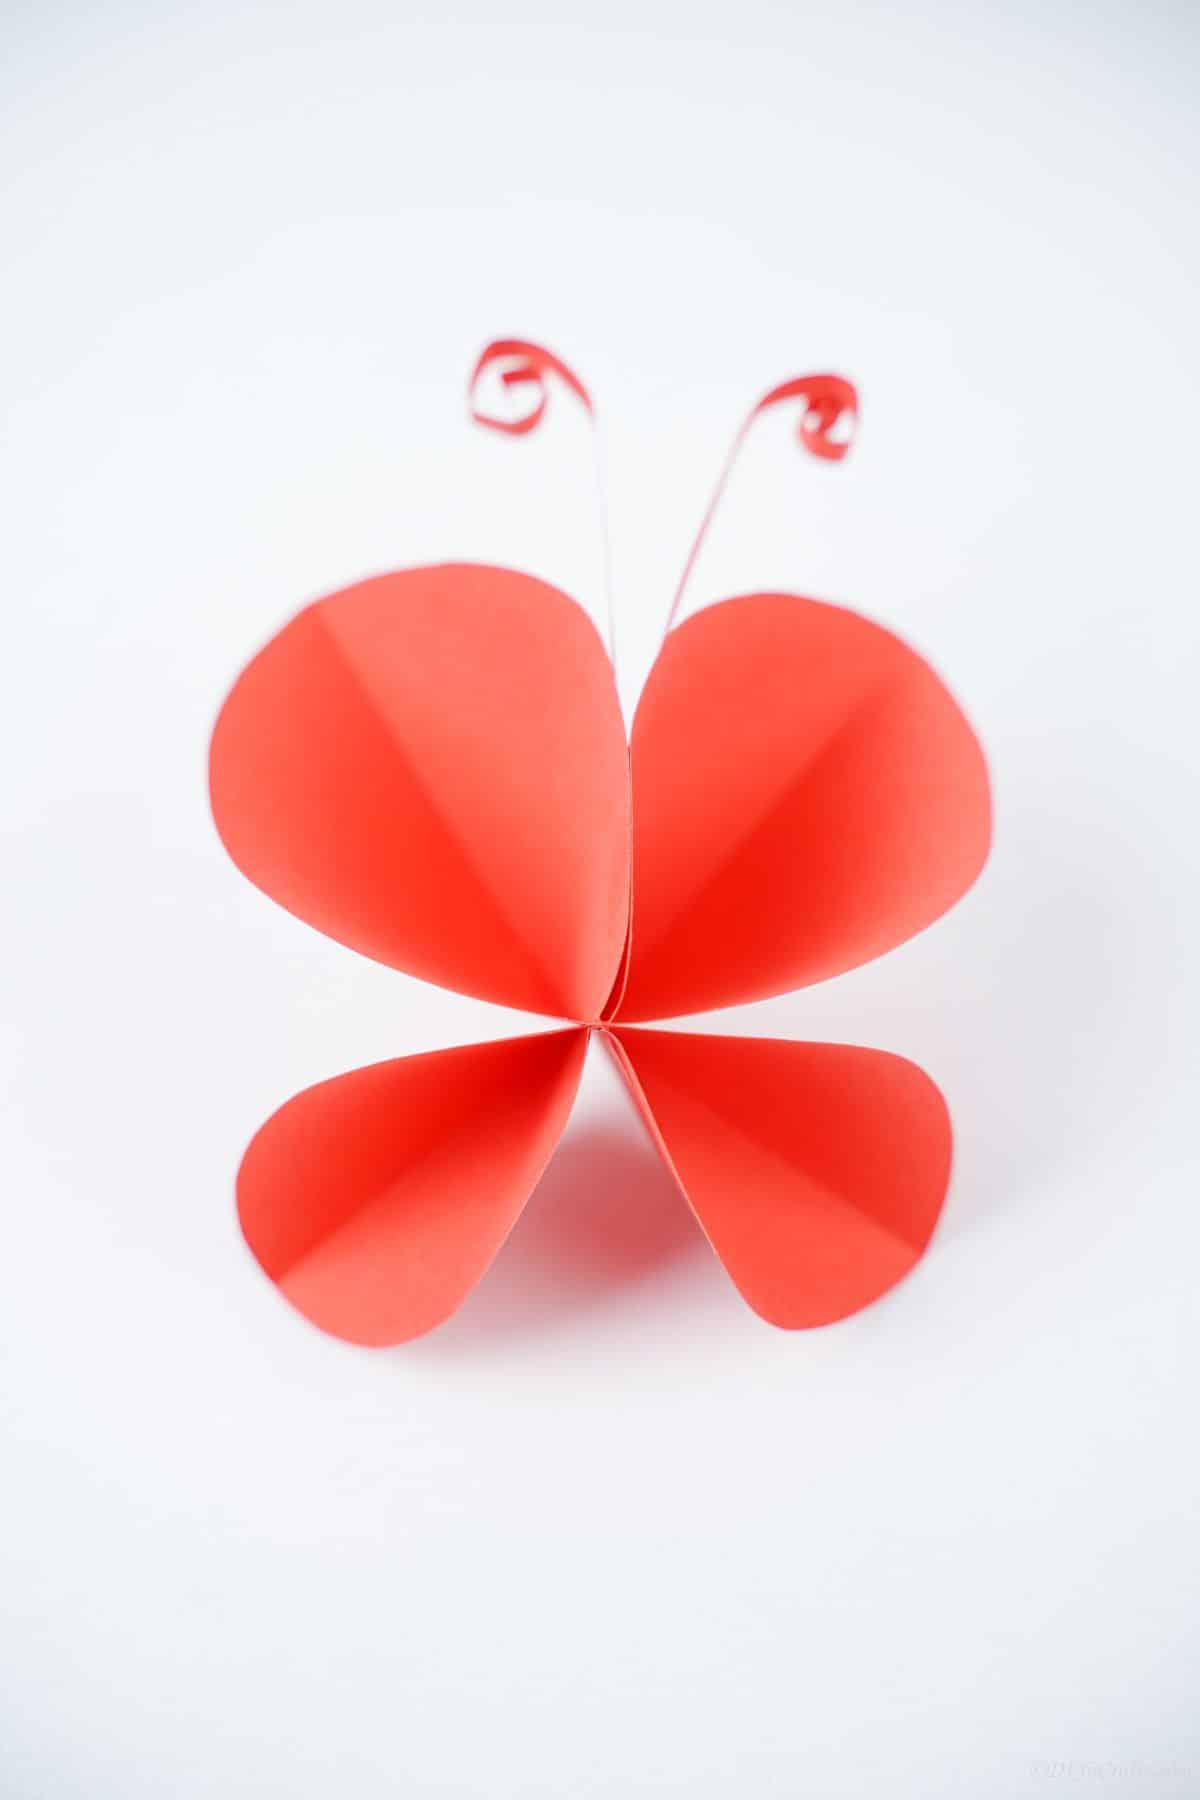
Now, snap them both in the middle so that the two pieces are together and each piece is folded in half to make four sides.
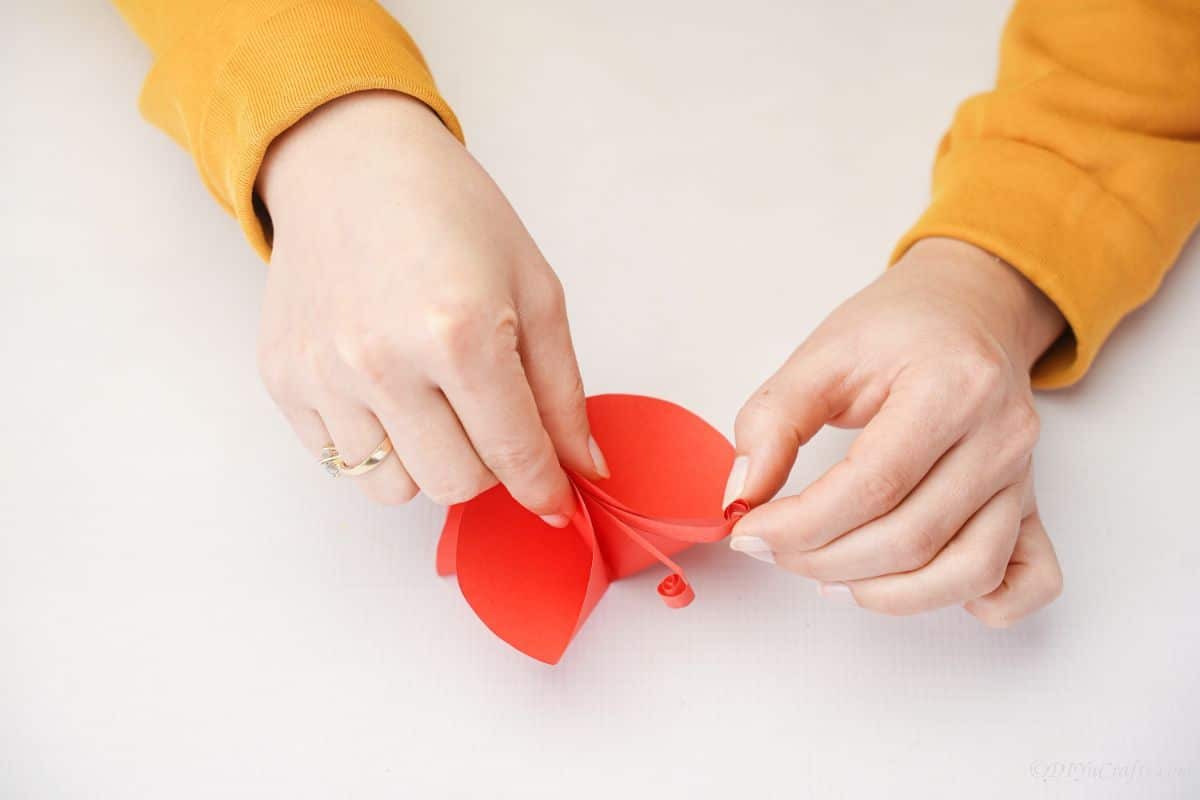
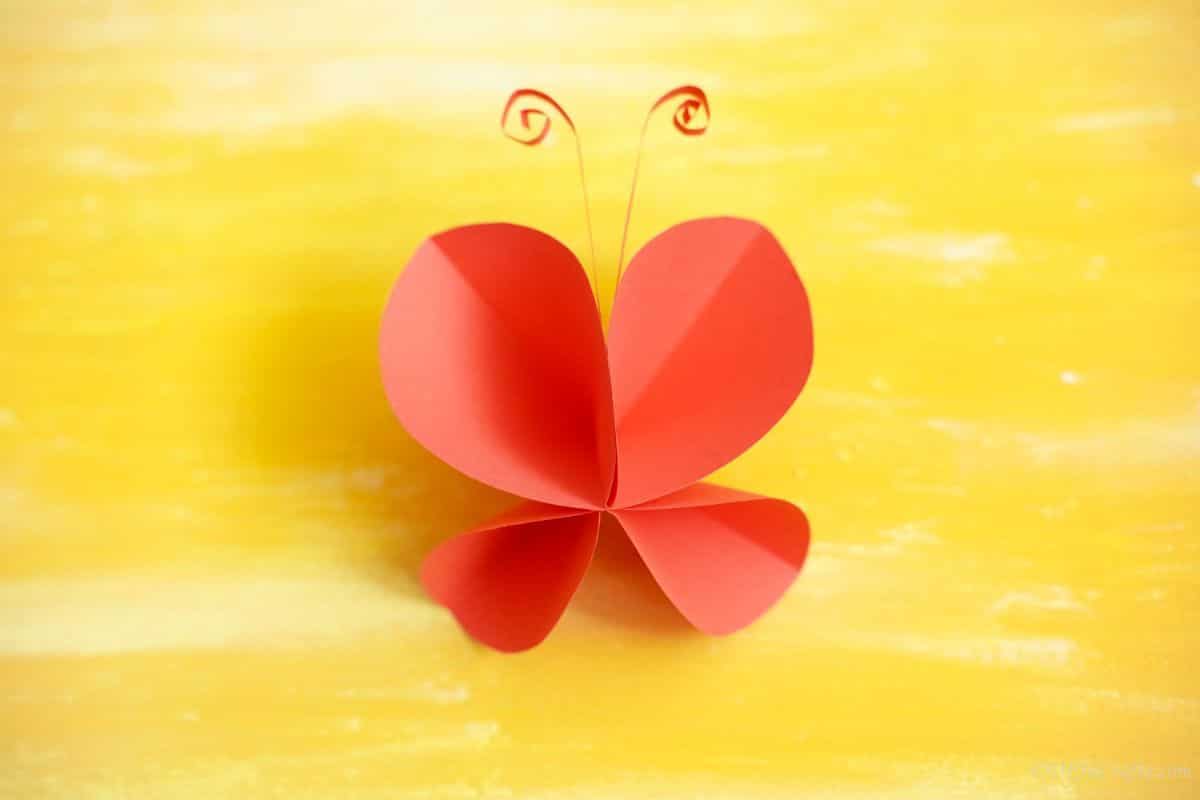
Now, fold the sides in, so that the outside is rounded, but clearly making a set of wings. You will do this on all four sides until you get the look you want.
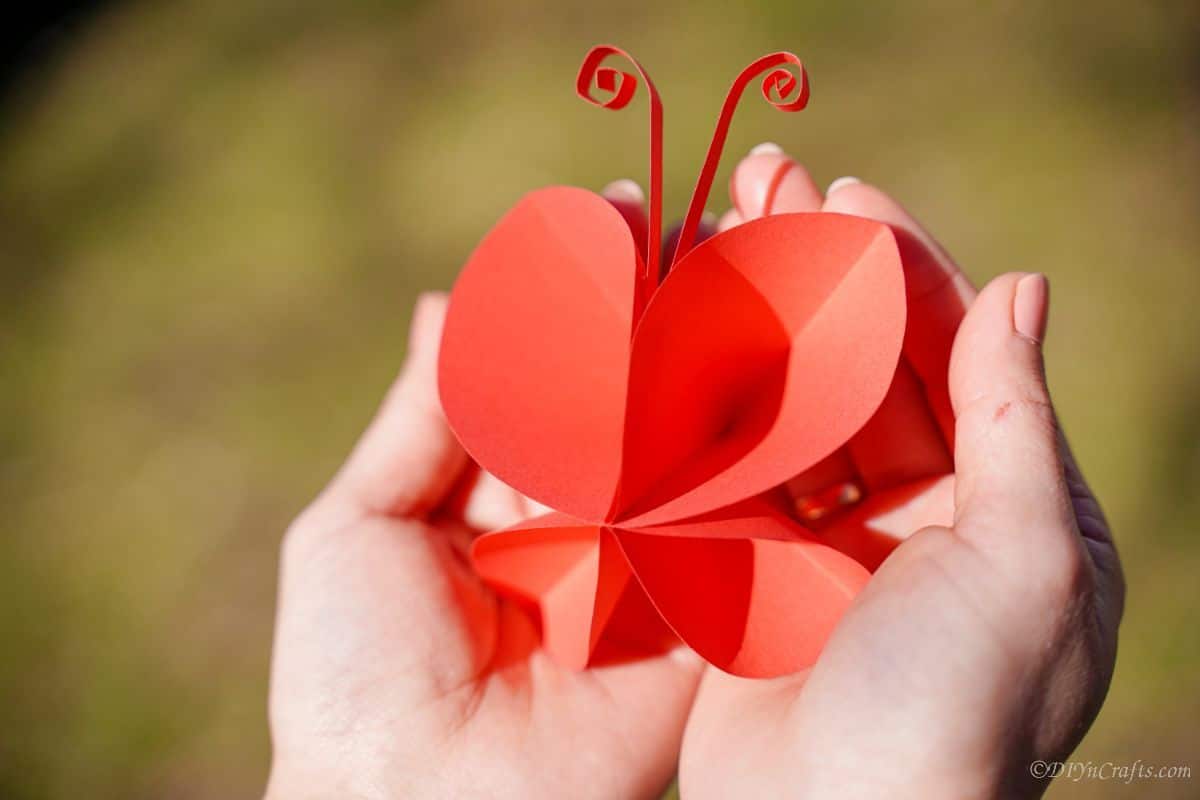
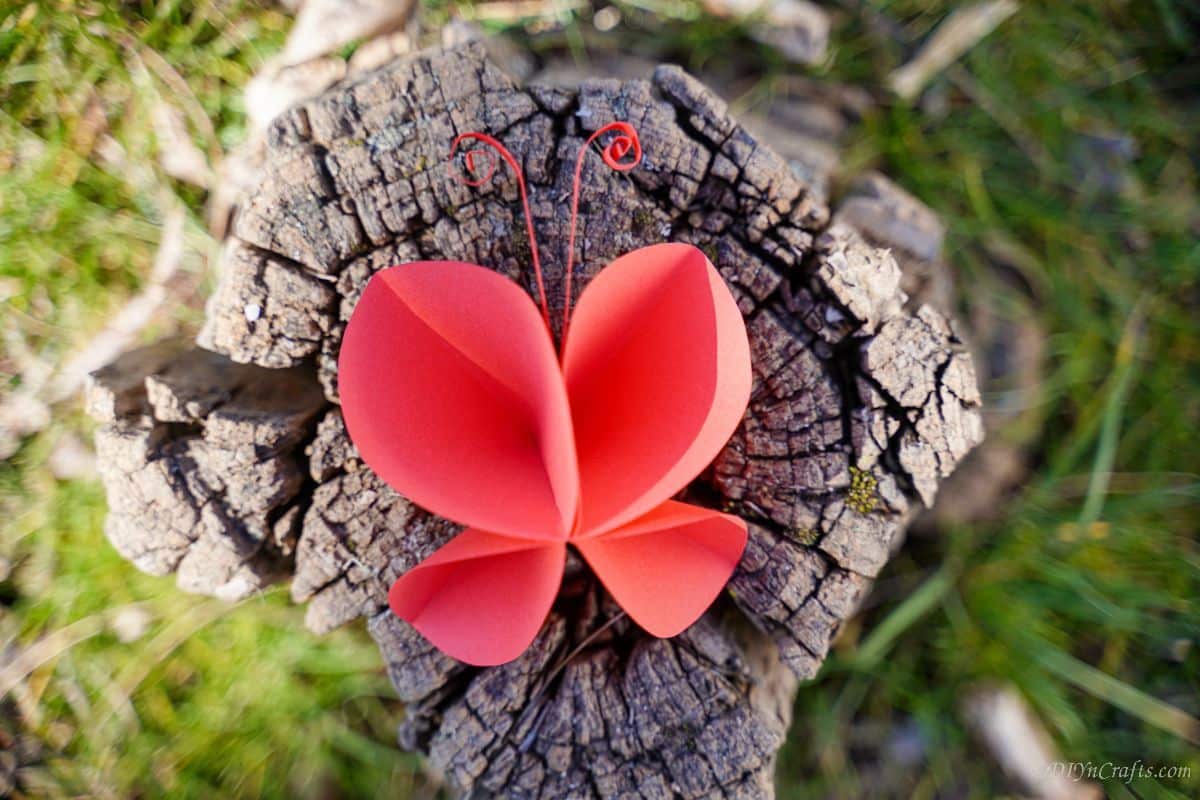
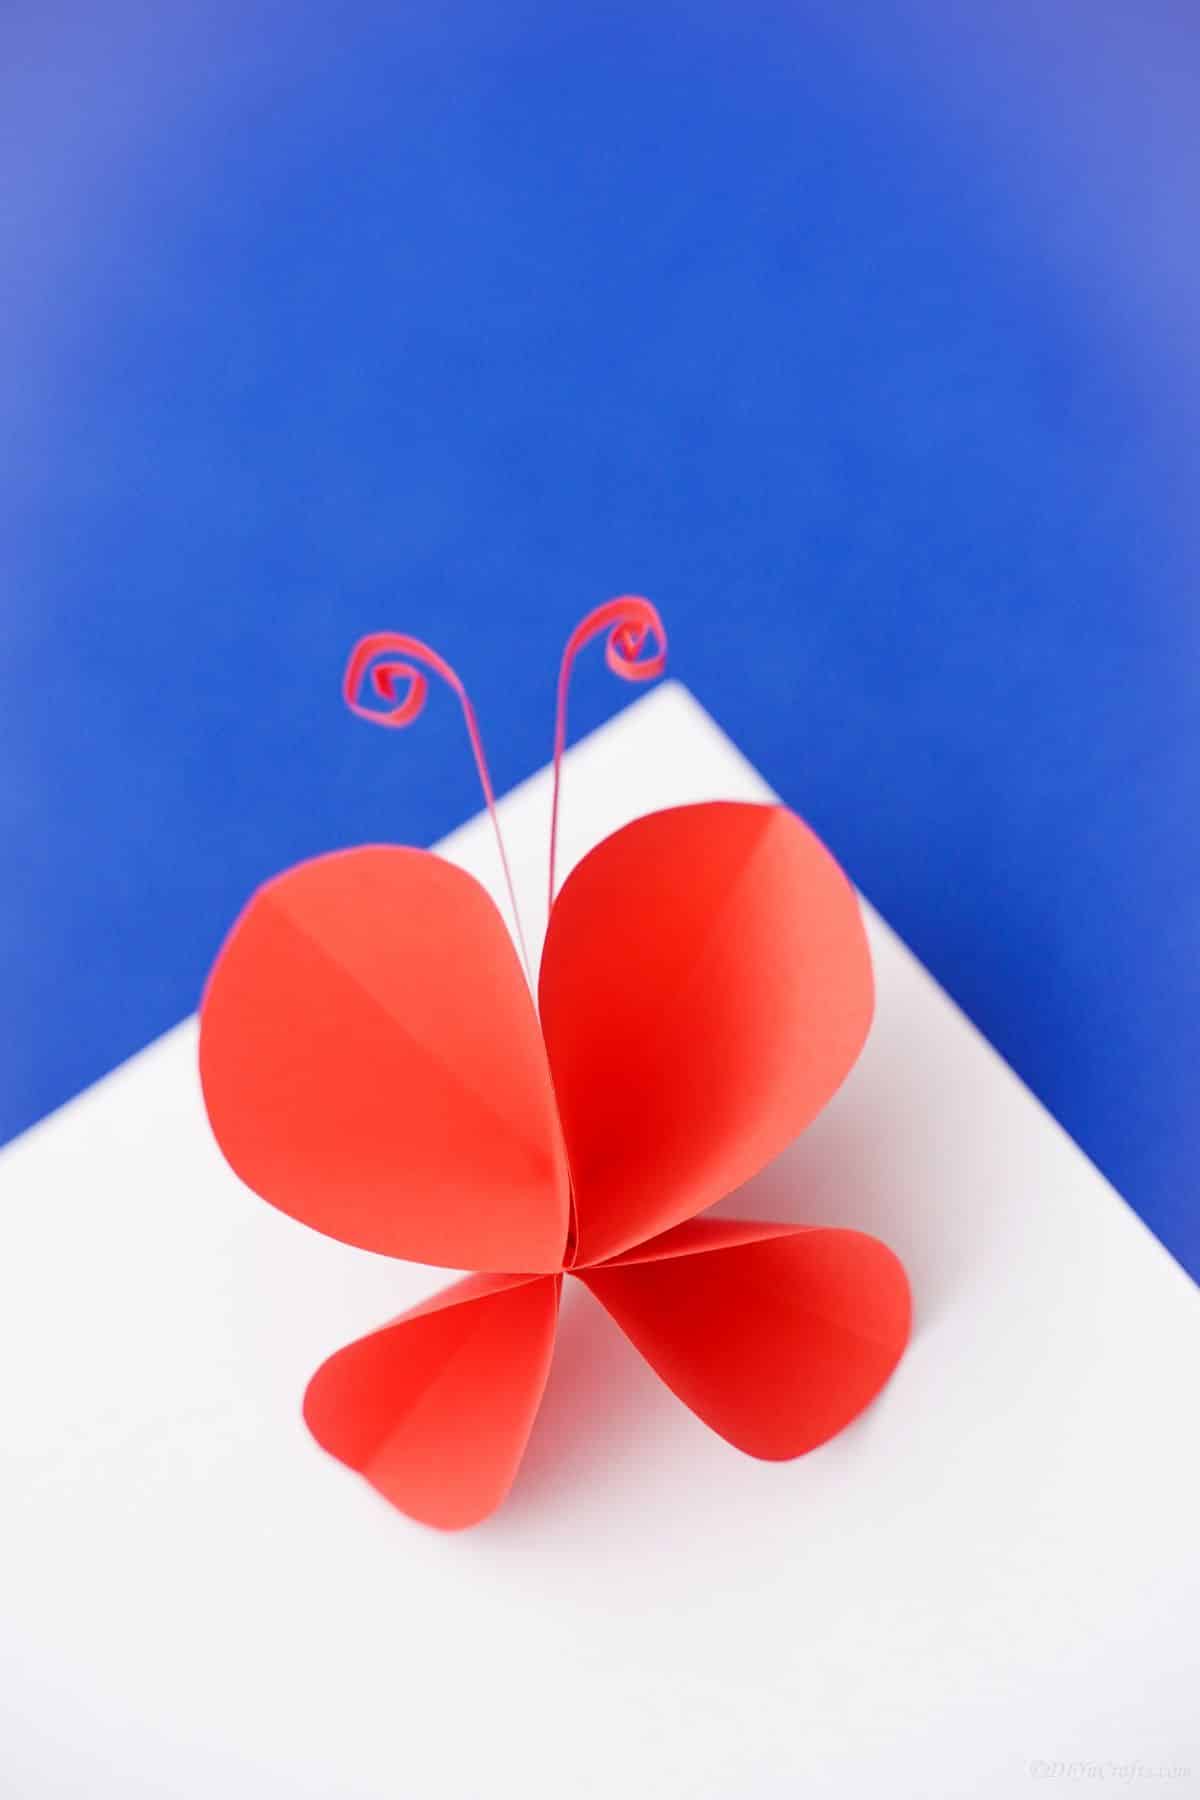
Now, using the extra piece of paper you cut earlier, fold it in half, and glue the folded half inside the center of the butterfly.
Then, carefully roll the ends of the antenna to make the rolled ends of the antenna until you are happy with the way it looks.
Easier Kids Crafts
I love projects like this for kids. They are simple but also help them practice motor skills. Make this, or one of the fun ideas below, with your kids this weekend! Make sure you bookmark ideas you like, print tutorials, or pin them to Pinterest to create right away.
Similar Projects: Colorful DIY Plastic Bottle Wallet
Results: 1
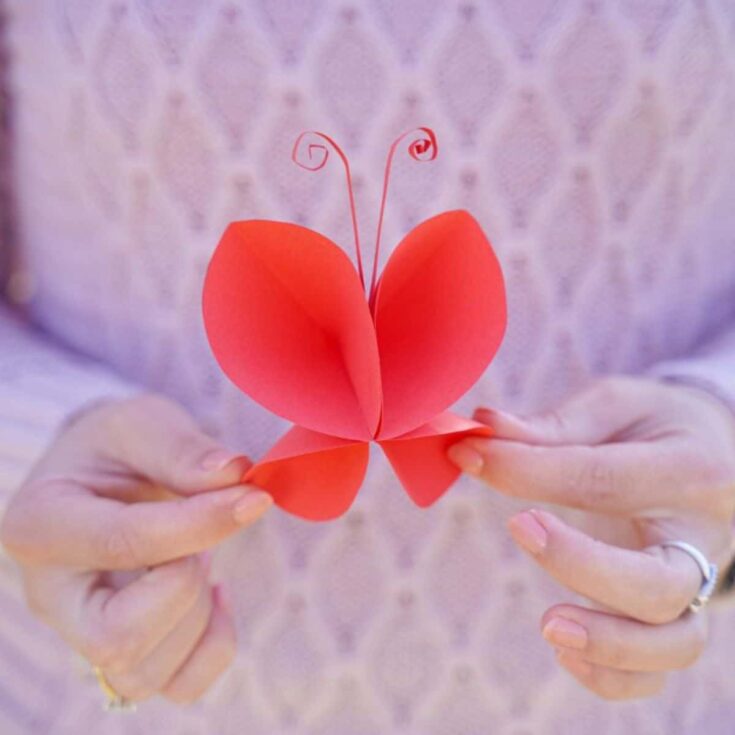
A simple piece of paper turns into a beautiful paper butterfly for the best kids craft! Quick, easy and free to build – it’s a hit!
Active Time
20 minutes
Total Time
20 minutes
Difficulty
Easy
Estimated costs
$0
Instructions
- Trace two circles on red craft paper that are 6″ wide.
- Cut paper circles.

- Fold one of the circles in half, then in half again to form a small rounded triangle. Unfold it once so that it is a semicircle with a crease in the middle.
- Fold the second circle in half.
- Then, trim the outside ½” to make it smaller.
- Repeat the process of folding it in half, then in half again, and unfold it as you did with the first circle.
- Place the smaller piece on top of the larger one, so that the cut edges line up. Then, snap right in the middle where they meet at the edge.
- Now, unfold it so that it has four sides.
- Then, fold each side inward so that it is rounded to make two sets of wings for your butterfly.
- Now, cut two identical sheets of paper, about ¼” wide and about 8″ long.
- Fold it in half, and glue the folded ends, inside the top of the two larger wings.
- Now, roll or bend the ends to make them look like antennas.
Notes
Make it in various sizes then use poster putty to hang it on the bedroom wall.
recommended product
As an Amazon Associate and member of other affiliate programs, I earn income from qualifying purchases.
Completed Project Gallery
Make a few and attach them to a bedroom wall for a nature-inspired look!